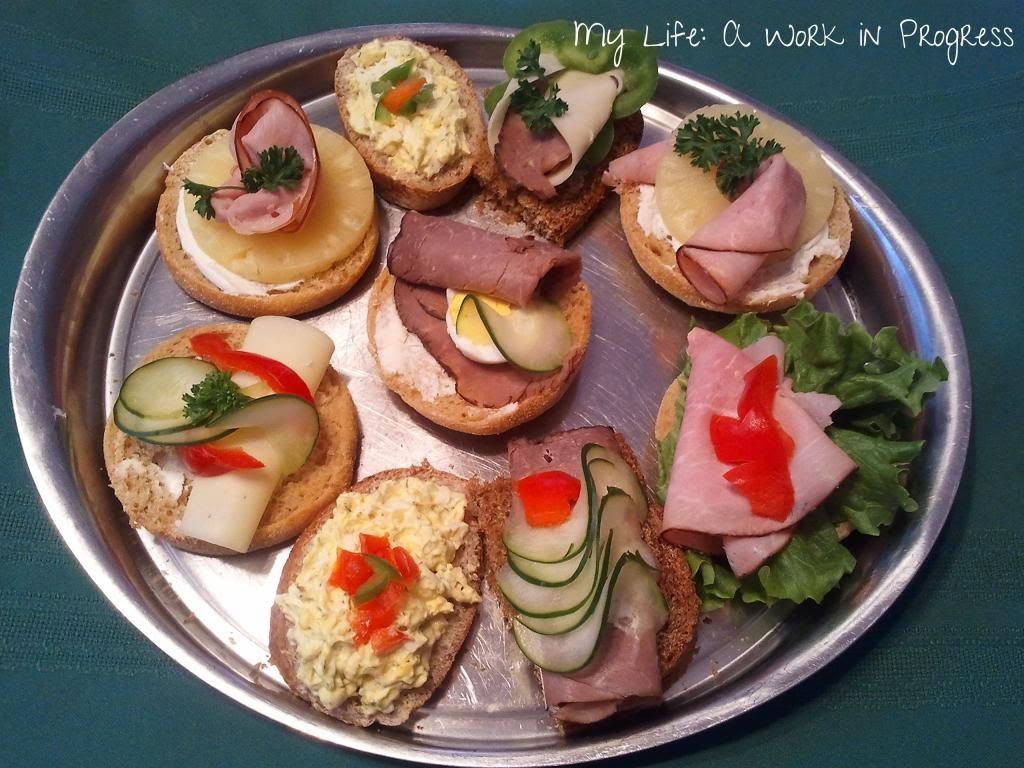
Smørbrød (“Buttered Bread”)- An American appetizer twist on the Scandinavian sandwich

My cowriter, Ruth, is back today, bringing us some of her time-tested appetizer recipes.- Elisebet

Long ago before the advent of internet and cable network television brought culinary expertise into everyone’s kitchen, I was living in Norway, and the diet was pretty bland. Boiled potatoes and fish were the staple dinner foods, albeit served smothered in butter. (Maybe Paula Deen is Norwegian?)

There was one gastronomic dish, however, where Norwegians excelled. Every housewife (as we were back then) had standard stores in the cupboard and fridge to set out a concoction so pleasing to the eye that one hesitated to spoil the creation with a first bite. Upon succumbing and actually tasting, the fare was never disappointing.

From that time up to the present day—open-faced sandwiches have been the go-to party provision for our household. My American/Canadian variation is a slightly smaller version, frequently used as a type of appetizer. (In Norway we ate the open-faced sandwich with a knife and fork, but then, in Europe they eat pizza that way, too!) Try them for a company brunch or Sunday evening late supper. It’s a unique food to bring to a church activity and works, as well, for breakfast with the kids. (Lay out the ingredients and let them help you assemble with their own “creations.” They’ll be getting more veggies in their diet.) Remember—the Scandinavian open-faced sandwich is not just layers of sliced meat and veggies: the components are thinly sliced (or small chopped) and arranged artistically on the bread.

Here are the basics followed by some suggestions and a couple of recipes.

There are four main components to Smørbrød:

1)     Bread. It must be firm. French and Italian loaves work well; also use English muffins, rye/pumpernickel, frozen waffles (toasted first), home-made bread maker bread, or “party” rye and whole-wheat for a smaller appetizer.

2)    Spread. Each bread slice needs to be coated to keep out moisture from your other ingredients. (This also allows you to make the sandwiches ahead of time and refrigerate until serving.) Try butter (or margarine), cream cheese (whatever flavor goes with your toppings), mayo (or salad dressing), and mustard.

3)    Protein. Thinly sliced meats (turkey, ham, beef); cheese (any kind that will slice thin); egg (boiled, scrambled); fish (herring, crab, sardines, salmon, shrimp, etc.); salads (from any of the above, also from veggies – carrot slaw, for example, or olive salad).

4)    Veggies/fruit and/or garnish. Just about anything goes here, as well. The key is to make attractive choices, as well as combinations that taste good together. Cut the veggies in strips or slice thin (the Scandinavian cheese slicer is what I use for making the cucumber curls). Chop herbs, veggies, or pickles for the garnish.

Here are some suggestions, though remember to provide your guests with choices; the sandwiches shouldn’t all be identical. Particularly for company, I suggest making up the sandwiches with a variety of meats and veggies plus a salad (or two). These are very economical—you’re only going to use one thin slice of meat or a couple of tablespoons of a salad per sandwich.

Smørbrød Ideas:

1)   The Breakfast Treat. Cream cheese spread on a toasted waffle. Add pineapple ring, a few banana slices, and a fresh strawberry. Garnish with mint.
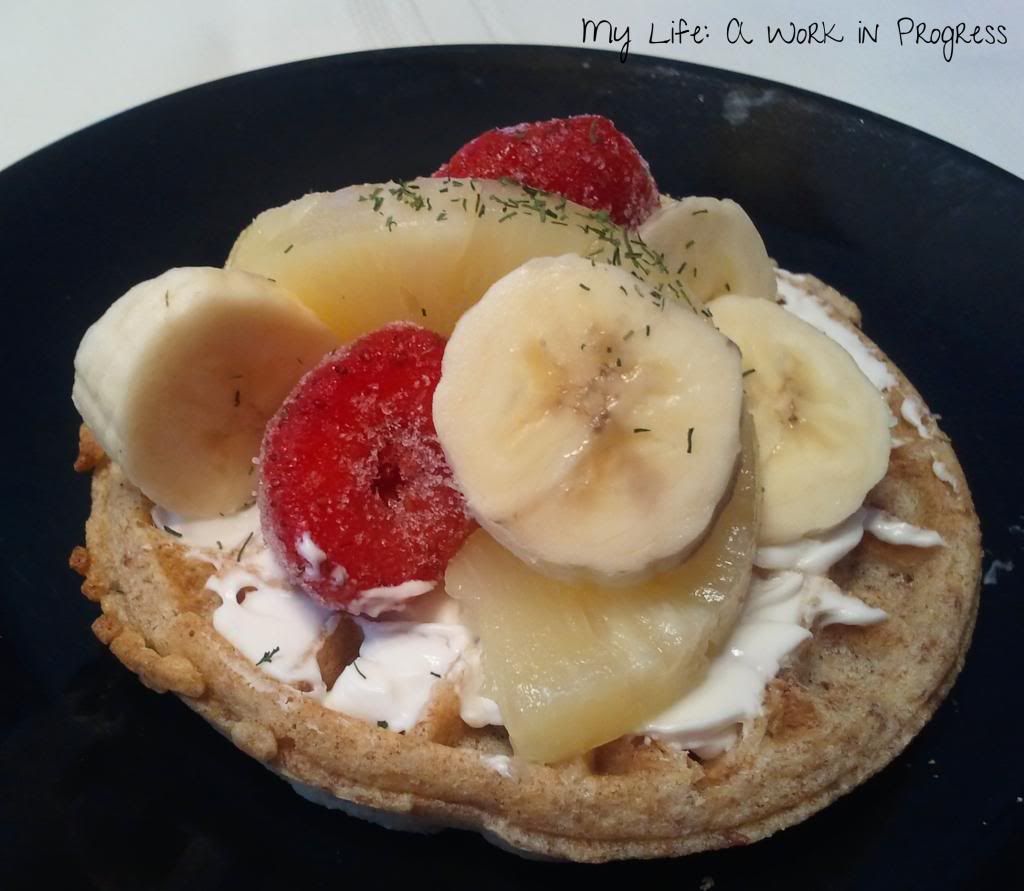
The Breakfast Treat

2)   The Mexican Breakfast. Scrambled eggs on buttered rye bread with chopped tomatoes (or salsa) for garnish.

3)   The Hawaiian. Pineapple ring on an English muffin half spread with cream cheese. A thinly-sliced ham roll-up through the center of the ring and parsley garnish on top.
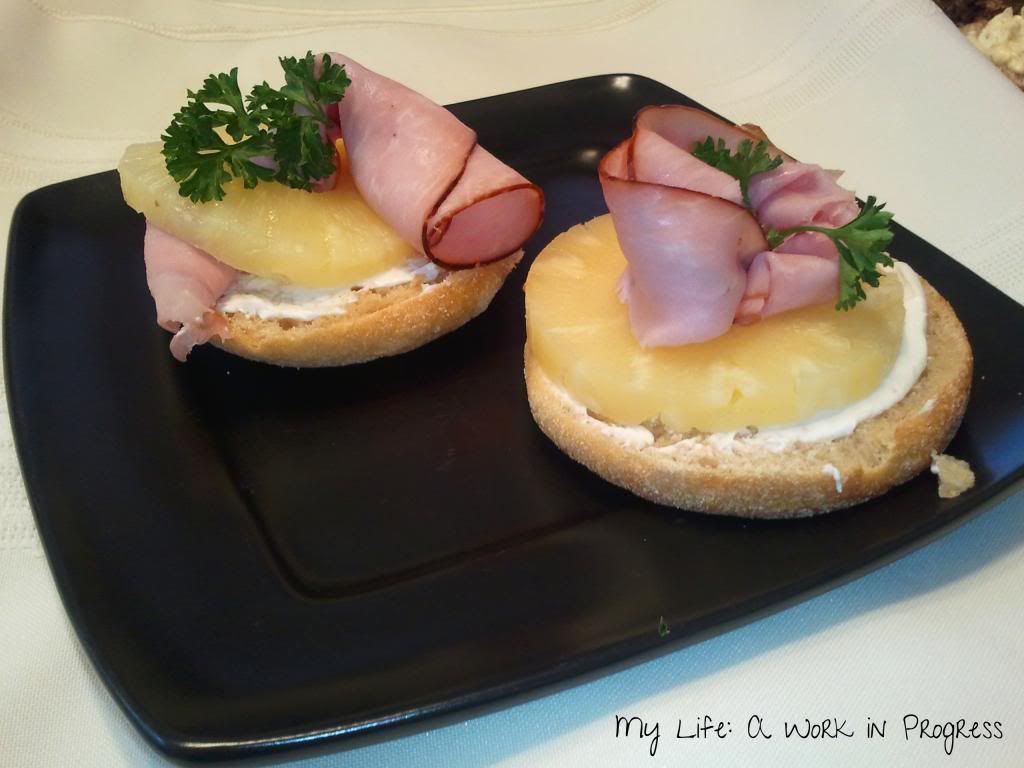
The Hawaiian

4)   The Fisherman. Buttered “party” whole wheat bread slice (or use English muffin half for a larger appetizer) with salmon salad (recipe provided below) and chopped dill pickle garnish.

5)   The Valentine Appetizer. Mustard spread (horseradish if you’re brave) on a slice of French bread topped with a thin roast beef slice folded or rolled; thinly sliced cucumbers with a red pepper “heart” garnish.

The Valentine Appetizer

6)   The Italian.  Buttered Italian bread with an Italian cheese slice and Italian salami. Both sliced, rolled and placed over leaf lettuce; thinly sliced tomatoes and cilantro garnish.

7)   The Greek. Olive salad (recipe provided below) on a buttered English muffin half with cucumber curls and crumbled feta garnish.
Salmon Salad with Dill Pickle Garnish

Ingredients:

  • 7-8 oz. can of salmon
  • 6 T. light mayonnaise (or salad dressing)
  • ½ t. dill weed (optional)
  • 1 T. brown or Dijon mustard
  • Salt and pepper (to taste)
  • Two dill pickles (chopped small)

Directions:

Drain the salmon well, removing skin and bones. Mix mustard with the mayo, then add with dill weed to the drained salmon. Stir until well mixed. Depending on amount used per slice, makes enough for 6 English muffin half sandwiches or 1 ½ dozen “party” size slices. (For English muffin halves, use a teaspoon of chopped dill pickle in the center of the sandwich; “party” slices will need less.)

Kalamata Olive Salad

Ingredients:

  • 5-7 ounces Kalamata olives (pitted), coarsely chopped
  • 1/3 cup light mayonnaise (or salad dressing)
  • ¼ t. olive juice
  • ½ T. minced garlic (optional)
  • ½ t. chopped parsley or cilantro

Directions:

Mix all ingredients together; place on bread slices and add veggie garnish.

What are some of your favorite appetizers? Have you ever tried Smørbrød or open-faced sandwiches like this before?
Continue Reading

Using a digital kitchen scale for baking (MIRA review)

Disclosure: I got this product as part of an advertorial.


Did you catch my first post on using a digital kitchen scale? In that post, I focused on using a kitchen scale for portion control. The servings you eat affect your waistline and your wallet. Today I’m writing about using a digital kitchen scale for baking.

Have you ever come across a recipe that used grams or ounces instead of cups and tablespoons? If you have, chances are it was a recipe that originated overseas. Most household kitchens in the US don’t have a scale. I did some web searching to figure out why that’s so. King Arthur Flour has a fascinating (well, it was to me, anyway) section that discusses the history of baking measurements in the States. The site suggests that in the early 1800s, it was easier for Americans- especially those heading west in search of a homestead- to measure items with a “teacup” or “butter the size of an egg” and so on. Early American recipes and old cookbooks contain these types of measurements.

Sometimes recipes geared towards North America still have the weights written in next to the measurements (like the recipe I use below). Why does it matter? Why use a scale?

There’s a reason why measuring is important for recipes, especially when baking. Measuring cups and spoons just aren’t accurate enough. I usually blame my oven when something I bake doesn’t turn out as expected, but after learning more…I wonder if perhaps my measurements are off from the start.

To begin with, not all measuring cups are the same size. I’d never even taken this into consideration before researching. I would bake a cake and use one brand of measuring cups for flour and pull out a different brand to measure my sugar. The proportions are probably going to be off, unless you use the exact same measuring cup for measuring each ingredient.

Second, ingredients themselves can vary in size. A cup of flour in Southern Florida is going to contain more moisture and be fluffier than a cup of flour in dry Arizona (or winter in the North East). So if it’s humid, you’ll probably need to fill up your measuring cup a little more, and if it’s dry outside- the opposite.

The weight of flour, however, is something you can rely on, year round. So use that kitchen scale! It’s the same concept for most foods- dates, prunes, raisins, chopped carrots, sugar, grated cheese, and so on.

How much does a cup of flour weigh? Well, that’s debated. King Arthur Flour recommends 4 1/2 ounces, and that’s what they use in their recipes. TheKitchn.com, a popular home kitchen site, has a list of flours -all purpose, bread, whole wheat, pastry, etc.- and their recommended weights for each.

If the recipe you’re using gives a weight (or perhaps it’s listed in the beginning of a cookbook), always default to that. Other than that, you’ll most likely develop your own preference as you use your scale more.

For more on the accuracy of kitchen scales and why many people like them, read this article from the New York Times.

And I’m not going to waste this opportunity to promote my favorite brown sugar cookie recipe! These are my second favorite kind of cookies ever. They are in no way healthy, but they are SOOOOO TASTY. The recipe is for “Chewy Brown Sugar Cookies” from SeriousEats.com. Keep scrolling to see how I use a digital kitchen scale to measure my dry ingredients.

For this recipe, I used a MIRA Glass Digital Kitchen Scale (in gray). As I mentioned in my previous kitchen scale post, the tare function means you can “zero out” the weight of whatever bowl or plate, etc., you place on the scale.

In the photo below, I’d just added brown sugar. My egg and melted butter were already in the bowl. I pressed the “on/off/tare” button once, and it reset the scale to zero. Then I started scooping in my brown sugar until the scale read 330 grams.

If you don’t want to weigh in grams, just press the “unit” button. This scale also weighs ounces/pounds, millilitres, fluid ounces, and grams. Like the MIRA stainless steel scale, this glass one has an automatic shut off function and can weigh up to 11 pounds.

So after baking my cookies, guess how many dishes I had to wash? Just what you see in the photo below, plus my cookie sheet. Not bad, eh?

By the way, in case you’re wondering which scale I’m going to keep and which scale is going to make it into the kitchen of my sister-in-law-the-avid-home-baker…I’m keeping the stainless steel scale. They both work equally well. The glass scale is a little larger, and it looks classier. But I feel that the stainless steel top would be a little sturdier if I drop anything on it, and I’m a total klutz!

They’re both lovely, and I would recommend checking them out on (affiliate link>) Amazon. There are different colors available for the glass scale, which I think is pretty cool. The orange one is my favorite. 🙂

So what do you think? Did you learn something new about kitchen scales and measuring cups? Would you be willing to use one in your kitchen?

Note: I received one or more of the products mentioned above for free using Tomoson.com. Regardless, I only recommend products or services I use personally and believe will be good for my readers.

Continue Reading

Two-Ingredient Fruit and Nut Balls (Fitness Friday)

I previously blogged about making fruit and nut bars (homemade Larabars), and today’s post is a variation of that recipe. If you don’t have a food processor, you may want to check out the original post, as that gives you an alternative to make them with a pastry cutter and an immersion blender.

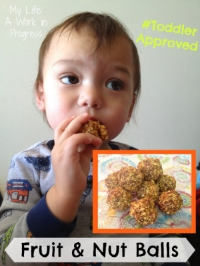
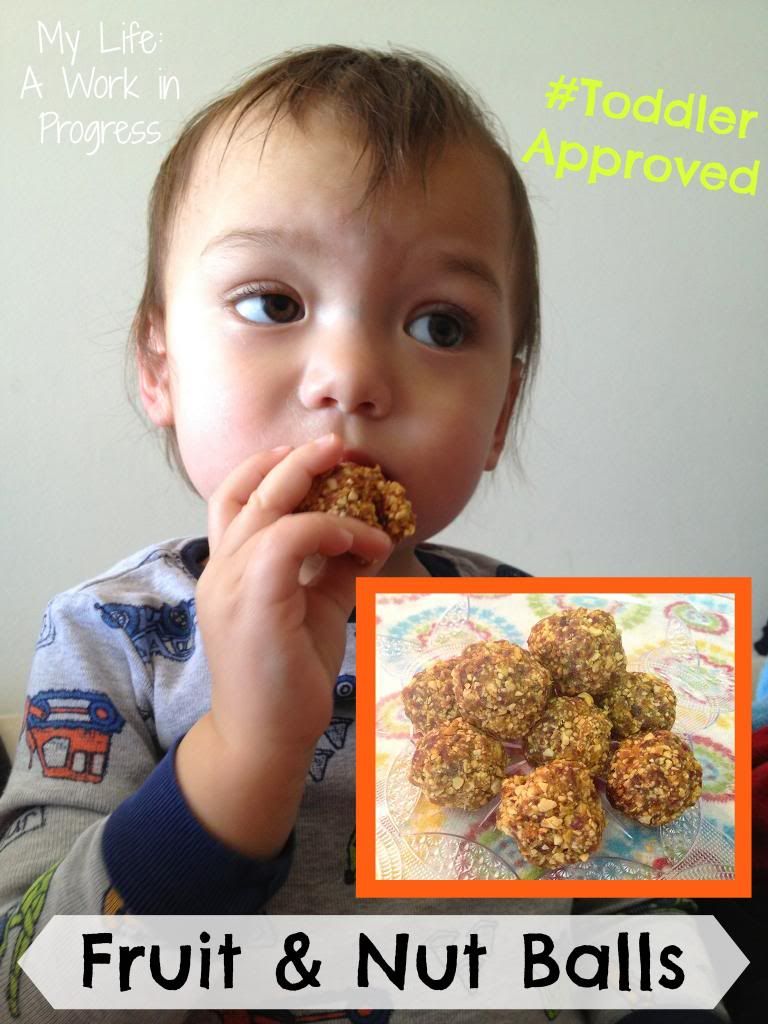
With just two ingredients -dates and peanuts- you can make inexpensive fruit and nut balls that are packed with minerals, protein, fiber, and carbs. Store them in the fridge or the freezer, and grab one when you need it. They’re great for a post-workout snack or to keep your energy levels up during a run. My toddler won’t eat peanuts or dates by themselves, but together… he can’t get enough of them!

fitnessfridaywehaveitall3 button

Homemade Fruit & Nut Balls

Ingredients:

  • 1 cup halved peanuts
  • 15 medjool dates

Steps:

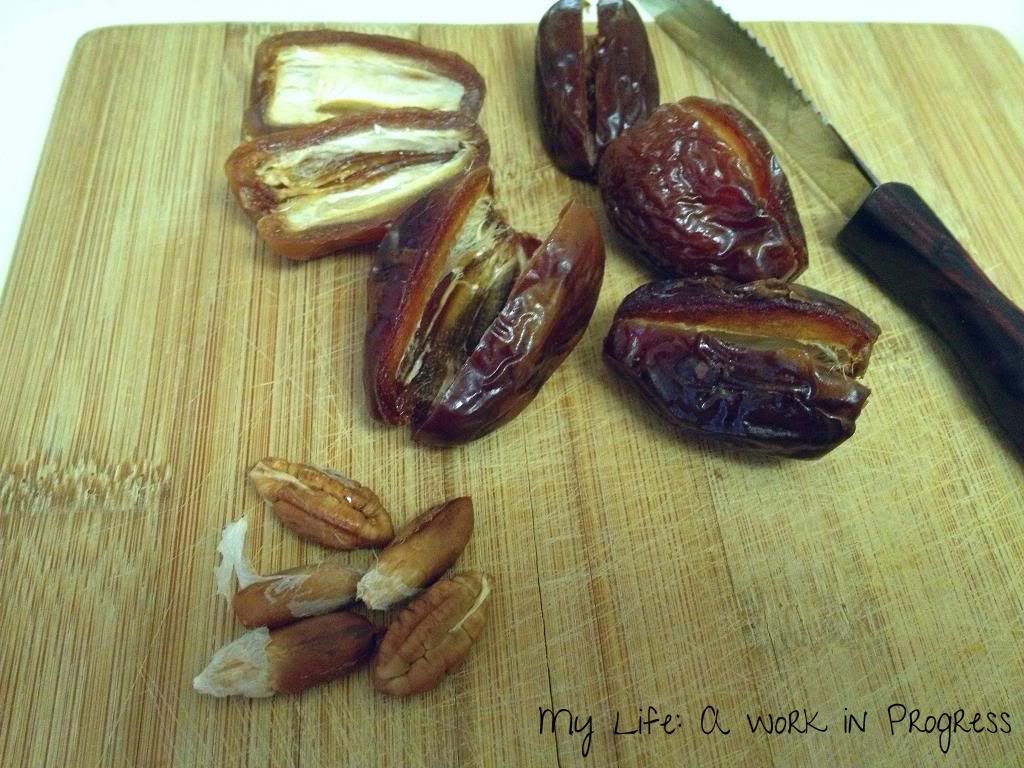
Remove the pits from the dates. I like to slice them lengthwise, until I feel resistance from the pits. Then I stop, open the date, and just pop the pit out.

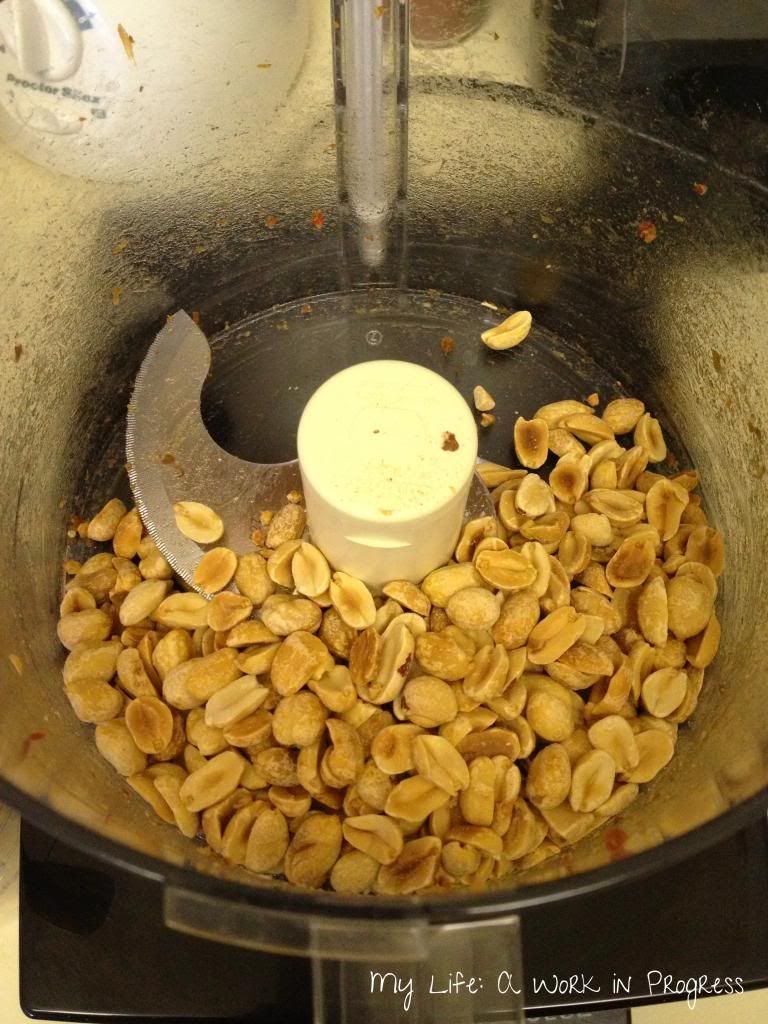
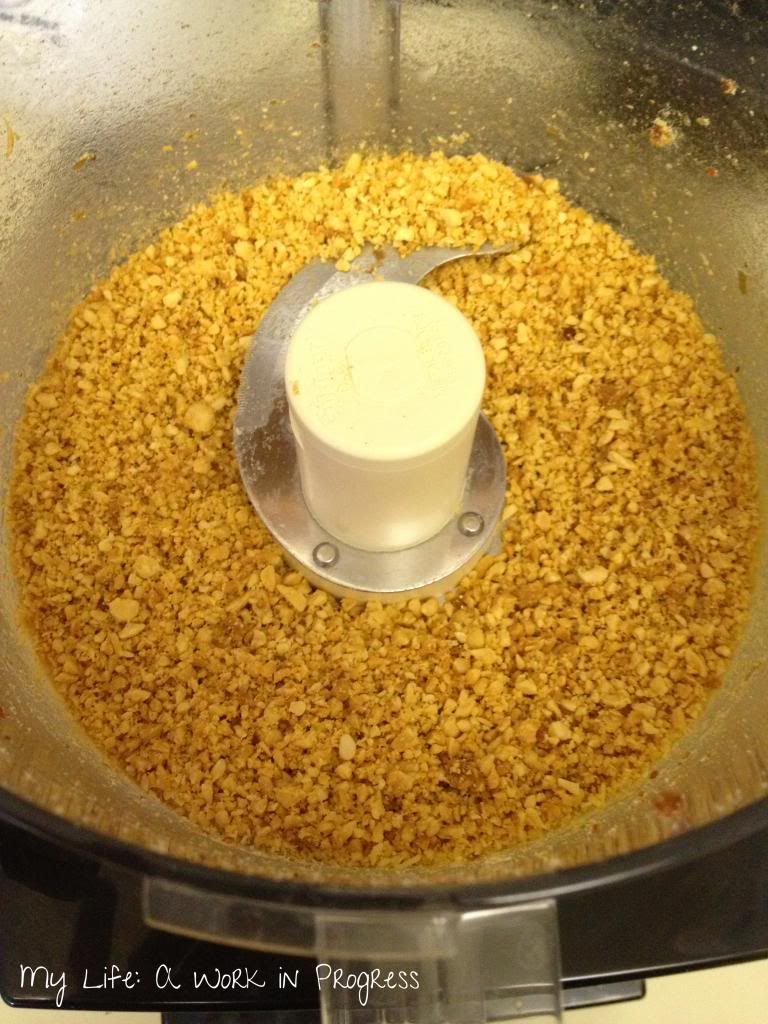
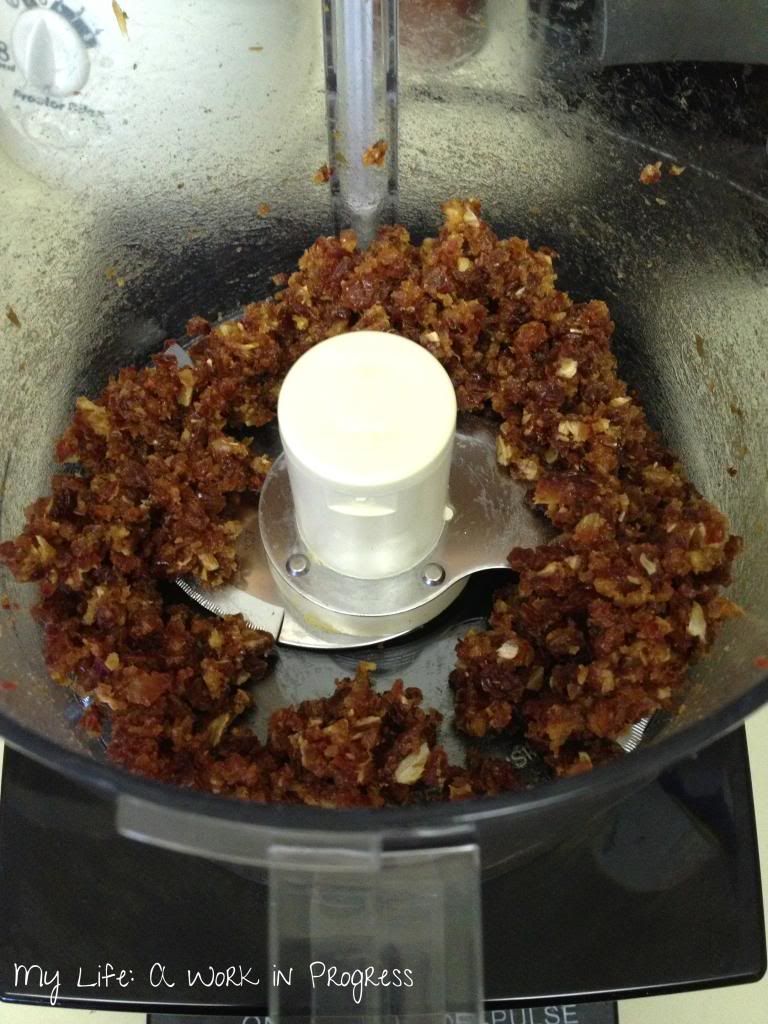
Soak the dates in a cup of water for about 5 minutes, to soften them (optional step). In the meantime, put your peanuts into the food processor and grind them until they’re finely chopped (about 10 seconds). They should look like the second photo below.

Remove the nuts from the food processor and place them into a bowl. Now put your dates into the food processor and pulse them for 15 t0 20 seconds. Add them into your bowl with the nuts.

(Sometimes I put the dates through the food processor first and then the nuts second. It doesn’t really matter, but if you’re soaking the dates, it saves time to chop the peanuts during that time).

Use your hands to mix the peanuts completely with the dates. Make sure it’s mixed really well and there aren’t any loose peanuts on the bottom of the bowl.

Then separate and roll your mixture into little balls. I make mine about the size of Swedish meatballs (1-1.5″ diameter). This mixture will make 14 balls that size. You’ll want to refrigerate (or freeze) them as soon as possible. They’re easy to wrap individually with plastic wrap, place in baggies, or just line them up inside a Tupperware-type container. (That’s what I do.)

If I make 14 balls from this mixture, then each one has about 128 calories along with protein, carbohydrates, and fiber. Both dates and peanuts naturally contain calcium, iron, vitamin B-6, and magnesium. Peanuts also contain magnesium.

(I was going to list the exact number of grams of each vitamin and mineral, but my brain was starting to hurt, and I was afraid I was just going to type the wrong thing! I’m horrible at math.)

If you can’t find dates at your regular grocery store, try a Middle Eastern grocery store. I’ve found dates at both a nearby military commissary and a Lebanese cafe/store. Another option would be to use raisins or dried cranberries. In that case, I’d use 1 cup of either to 1 cup of peanuts. Have a peanut allergy? You can use cashews, walnuts, or whatever suits your fancy. If you’re allergic to tree nuts too, then I’m sorry. 🙁

Fitness Friday Details:

Each Friday, I’m linking up with some awesome bloggers at JillyConyers.com and Wedonthaveitall.com to motivate each other on our fitness and/or weight loss journeys. We’d love for you to join! Don’t have a blog? Leave a comment and tell us what your goals are and how you did this week.

Diet:

This week I finally decided that my goal to build muscle probably won’t happen unless I eat more, especially protein. Once I came to that conclusion, I upped my limit on MyFitnessPal. But the limit wasn’t the problem; the issue was I just wasn’t hungry and eating enough. The first day, I forced myself to eat about 700 calories more than I wanted to. My stomach hurt that evening.

The next day… Oh wow! I was ravenous almost all day! It was like my body went crazy over the extra food and just wanted more. And I realize that’s what happened to me last week after my cheat day. I had trouble reigning my appetite in. I think I just haven’t been eating enough to sustain my current lifestyle.

Now that I know I need to eat more, I have to find the balance of exactly how much protein I need and how many carbs. I’ll probably switch it up a bit…heavy on the protein on lifting days and carb load if I have a big run.

I did do better at eating even more veggies and fruit this week, so that’s a win.

Stats:

Still right at 152 lbs. It hasn’t changed in two weeks, and I think that’s a combination of not eating enough (plateauing) and building muscle. I think I look more toned though, and that has me excited. Next week I’ll post my measurements, and we’ll see if I’ve made a difference in the last month.

Exercise:

Wow, this week was a difficult one. Like many people, the Polar Vortex has kept me and my toddler inside. We had almost a foot of snow here in Southern Virginia, which is not normal at all. Everything shut down for several days. I think schools are still closed today, actually. I can’t run outside with the jogging stroller, and even if the base gym were open (it’s probably not), Baby J has a bad cough, so I can’t take him there to infect other little ones.

If you want, you can read more about my internal struggle to LET GO over on my other blog. Home workouts have been the way to go this week!

Monday– Ran outside since the weather was decent. Got 5.4 miles in, then walked around the playground while Baby J played for 45 minutes or so.

Tuesday– Visited the base gym with the family workout room. Ran 1.2 miles on the treadmill (varied pace) as a warm-up before lifting weights. I only lifted about 10 or 15 minutes before Baby J started fussing because he was tired. I would’ve let him just cry and lay on my jacket to rest, but there were other moms in there, and I didn’t want any judgment for being “that mom.” So we headed home, and I lifted a bit at home with my adjustable Bowflex weights.

Wednesday– Did 40 minutes of a Brazil Butt Lift workout and lifted for about 20 minutes. By Wednesday night I really wasn’t sore at all and felt like I hadn’t been doing enough on Tuesday and Wednesday.

Thursday– I was able to get in a pretty intense ab workout once Baby J was in bed. I also did lunges, squats, and lifted with the Bowflex weights.

Friday– The forecast is supposed to be in the upper 40s today, so if this snow melts quickly enough, I’m going to try to run outside this afternoon. It’s supposed to be in the upper 50s tomorrow, so you can bet I will be outside running then! If I’m able to get in 5 miles between today and tomorrow, I’ll have met my Winter Miles Challenge for this week. I’ve really wanted to up my challenge from 10 miles to 20, but that hasn’t been possible with the weather and illness. Maybe next week!

Fitness-Friday-Jill-Conyers-button

So all things considered, it was an okay week! No, it did not at all go as planned, and I probably didn’t push myself as hard as I could have. But I did stay active even though I was cooped up alone with a sick toddler for almost 3 days!

Did you meet your goals this week? What are your goals for next week? What do you have planned this weekend?
Continue Reading