Terra’s Kitchen unsponsored review

Since I’ve been using the Terra’s Kitchen meal kit delivery service for a couple of months, it seems like time to review them. I’m not an affiliate; I don’t work with this company in any way, but I do like writing reviews for services that I appreciate and think others may as well.

Why I started ordering meal kits

Several years ago I reviewed Hello Fresh, another well-known meal kit delivery service, and I actually really liked it but decided the expense didn’t make sense for our family at the time.

Then a year or two ago (I don’t remember exactly when), my job was getting really, really busy, and I decided to try meal kit delivery again. I was willing to pay the money if it meant more time with my family and better food. We were eating a lot of pizza at that point.

I’d already used my free box from Hello Fresh, so I decided to try Marley Spoon, Martha Stewart’s company. I used that service for at least a year, and the food was really, really good. When I had issues with the way the meat was arriving, customer service actually listened to me. They ended up changing the way they delivered meats in their kits. But eventually, it was taking too much time. I was still spending an hour in the kitchen not including the multiple pots and pans that needed washing. I’m slow at chopping things.

I was exhausted. I stopped that service for a few months, and instead I tried making more slower cooker meals and easy things like pasta. But I still found that we were turning to delivery and takeout more than was good for us. All that sodium! And the cost. Yes, a meal kit service (especially Terra’s Kitchen) is pricey, but around the DC-Baltimore area, take out and delivery restaurants are expensive too. It’s normal for us to spend $10-15 a serving on food around here, not counting taxes, tips and/or delivery fees.

Why I chose Terra’s Kitchen meal kit delivery service

A local friend of mine was using Terra’s Kitchen before she moved to her new duty station on the other coast. She had a newborn, an elementary age child, and she was active duty military with her husband overseas. Terra’s Kitchen was letting her get home cooked meals on the table for herself and her kids, so I knew it might work for us too.

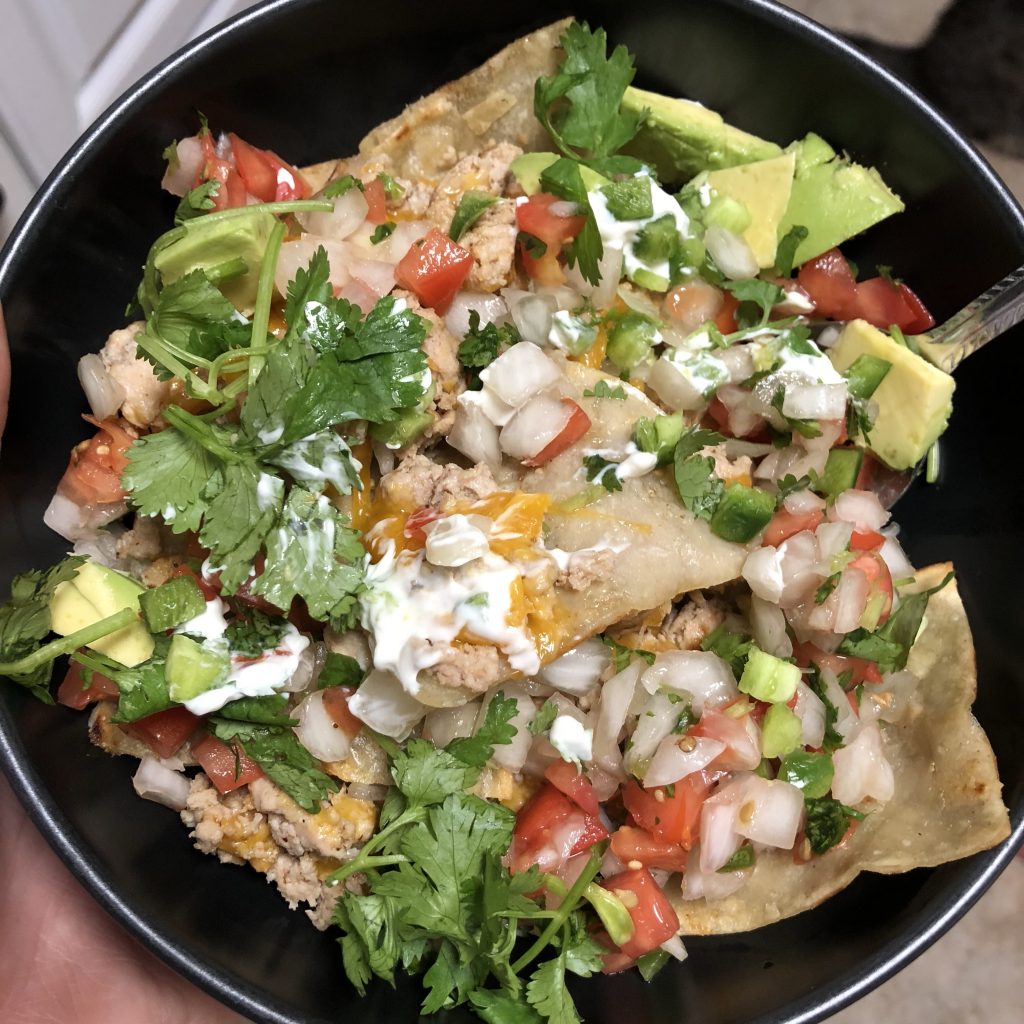
For me, the selling point of Terra’s Kitchen is that the veggies already come washed, peeled and chopped, and the meals themselves are simple and can be prepared in 15 or 20 minutes. I realize I may sound lazy to some of you all (she cant even chop her own vegetables- what!?), but until you walk in my shoes, you shouldn’t judge.

How it works

Terra’s Kitchen delivers the food in a reusable insulated box (super fancy!) the company calls a vessel. Ice packs are inside. Even during the heat wave this summer, I never had any issues with the food staying cold. The vessel gets left on my steps, and then as soon as I get home, I take the vessel inside, unpack it, and put the food in my fridge.

I get both email and text notifications when my vessel has arrived.
The food containers sit next to ice packs on little drawers that slide out of the vessel.

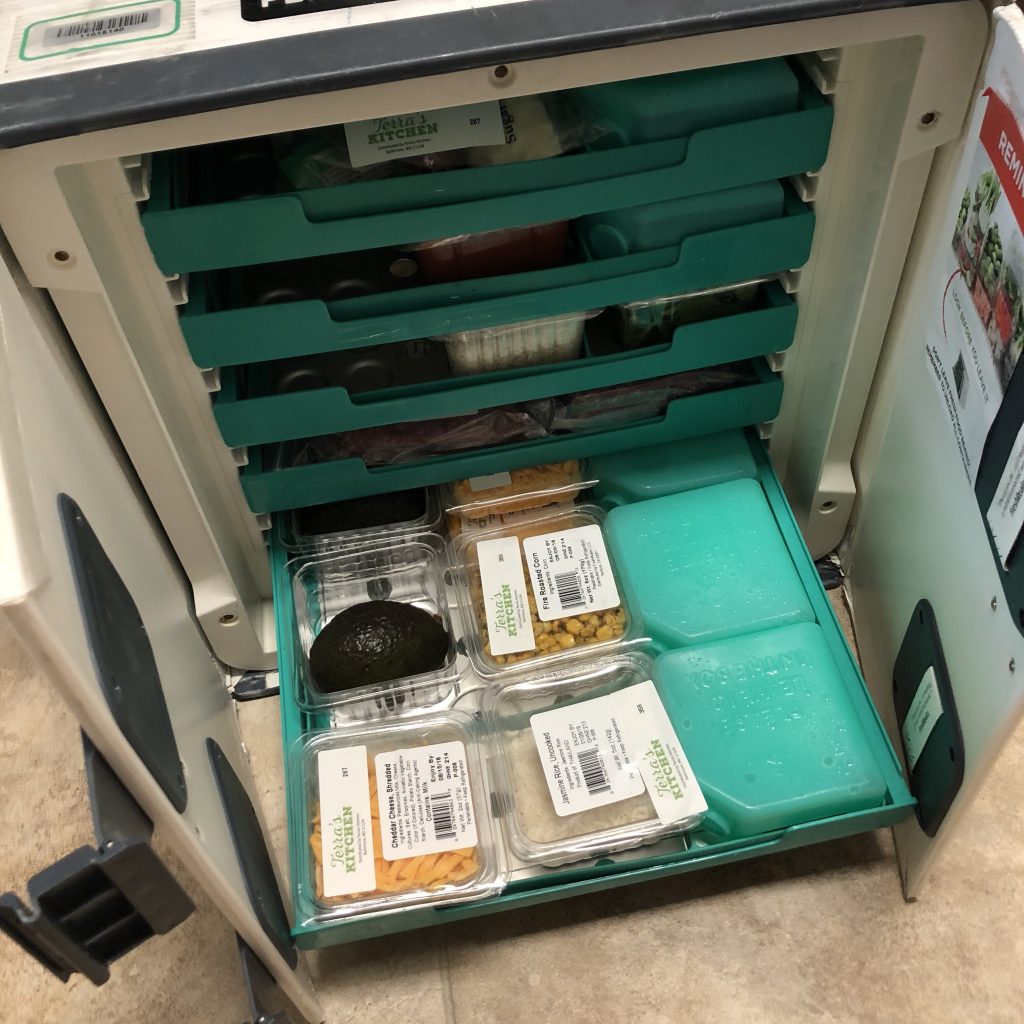
After the vessel has been unpacked, I pull my shipping label off the top and the return label is already underneath. Then I put the vessel back on the curb the next business day, and the shipping company comes back and picks it up.

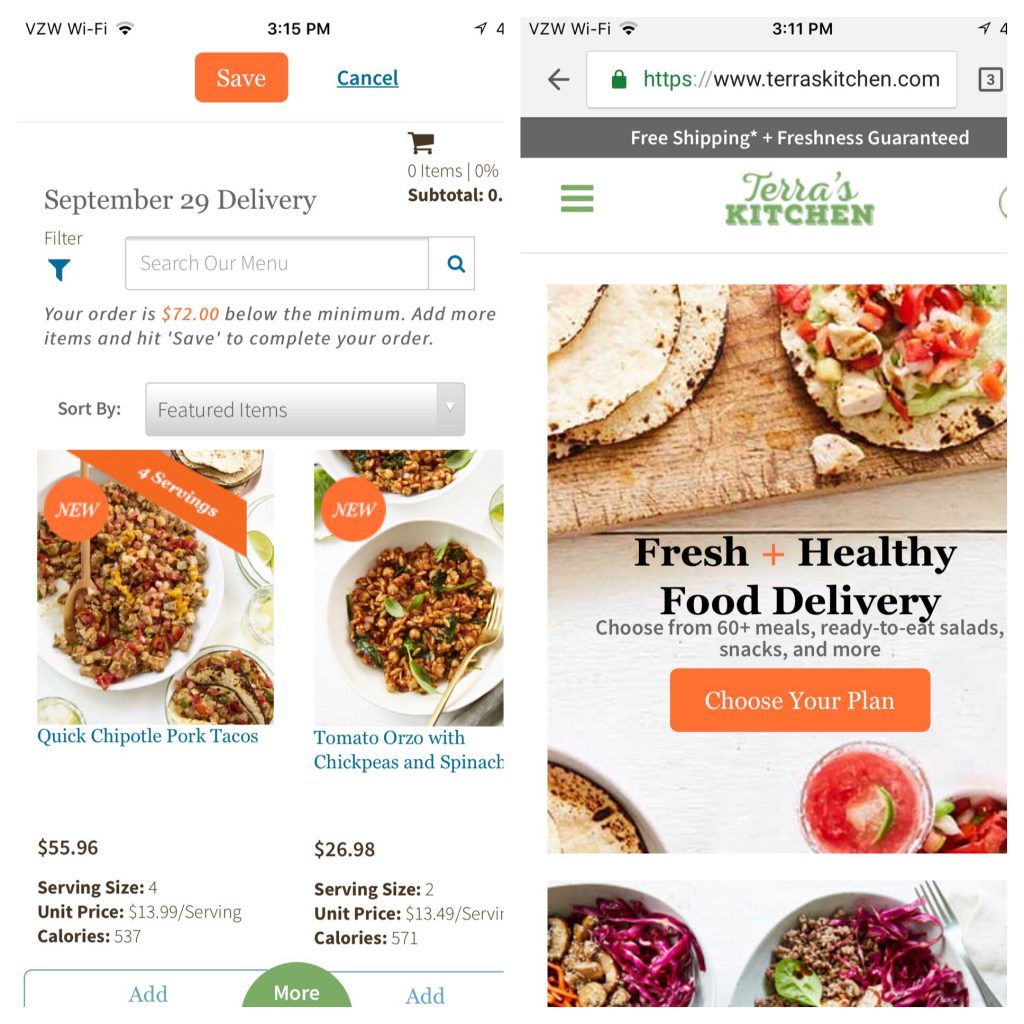
I use either the website or the phone app to select my meals. You can select dinner, lunch, breakfast, dessert and beverages. A little tracker on the site tells you how much room is in your vessel, so you can keep adding more food if you want. The price changes depending on what you select. Some meals are as cheap as $9.99 a serving; some are as much as $16.99 a serving. Some meals are for 2 people; some are for 4. You can search by the number of servings, or by an allergen (corn-free, dairy-free, etc.) or by eating style (paleo, gluten-free, weight loss, etc.). So there are really a lot of options for people.

Here are screenshots: the app is on the left, and the website is on the right.

If you’re in a hurry, they also have bundles that you can select. One bundle I saw recently includes salads, entrees, cold brew coffee, juice and fruit. I also noticed a keto bundle and a cleanse bundle. Both were around $100.

Orders $100 or more qualify for free delivery. If you order less than that, you will have to pay $6.99 for shipping.

It’s a subscription service, but it’s really easy to use the website or the app to skip a delivery.

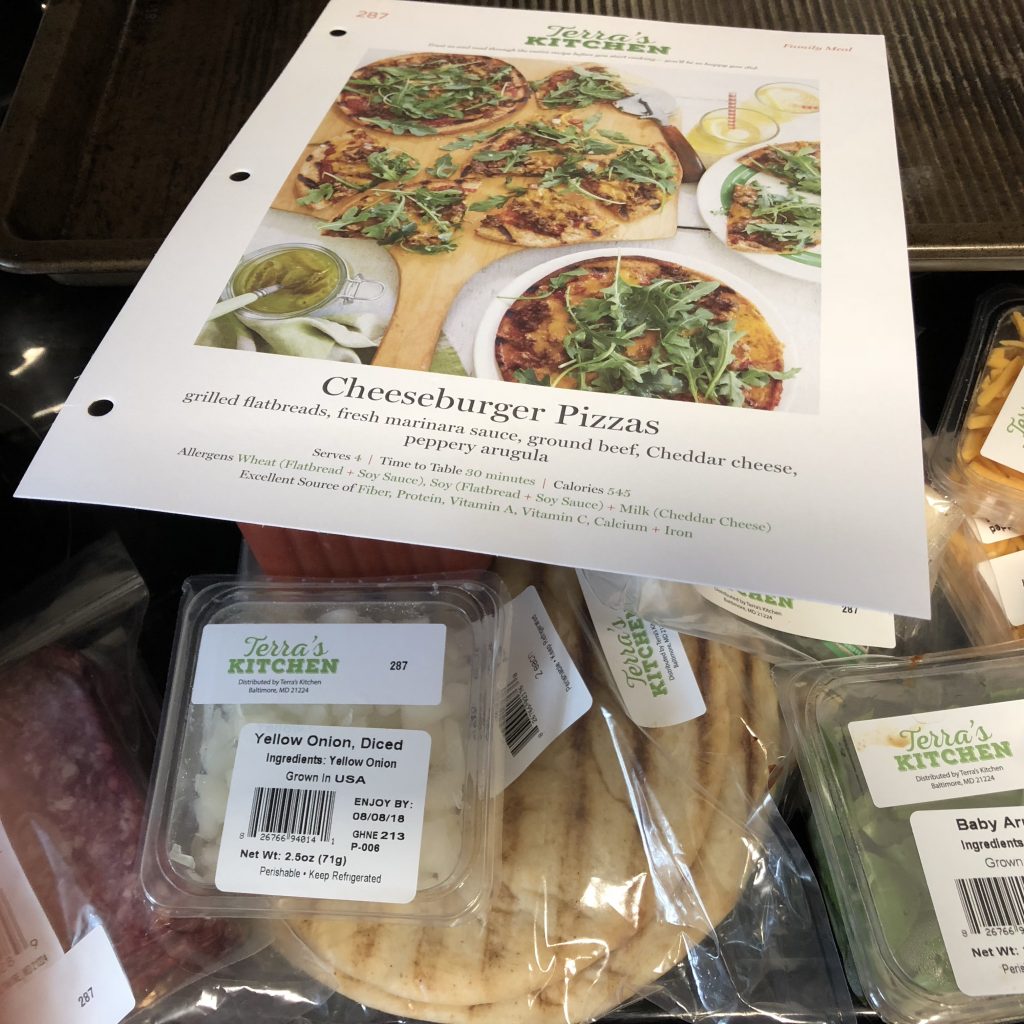
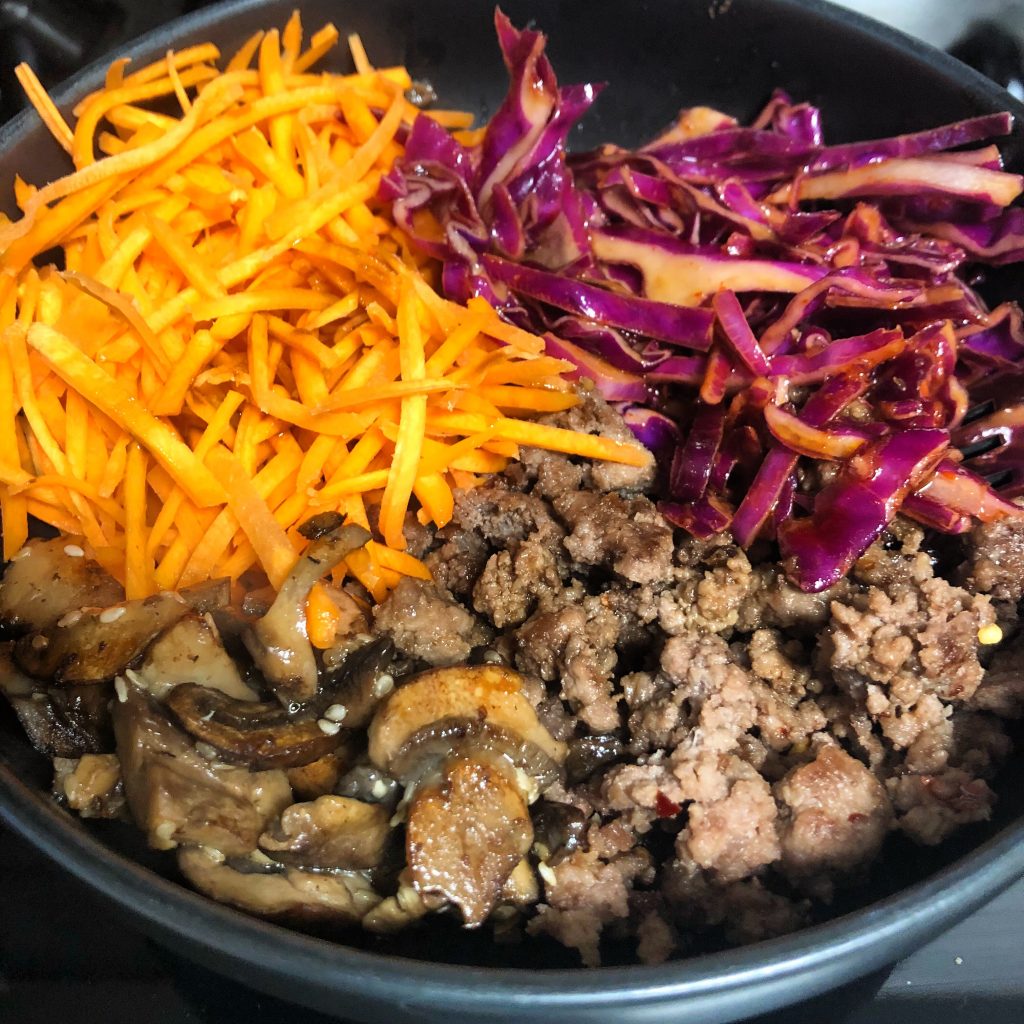
I had one meal from Terra’s Kitchen that I didn’t think tasted very good, but every other meal has been delicious and easy to make. Every meal comes with a recipe card with a number on it. The food has been separated into little containers that have the corresponding number on top, so it’s easy to figure out which ingredient goes with which meal.

Notice the number on the top left of the recipe card? The food containers have a corresponding number, so if you order multiple meal kits, you don’t get confused.
Cheeseburger pizzas
Loaded turkey nachos
Korean bibimbap- so tasty! Next time I’ll add an egg on top.

One of my favorite things about Terra’s Kitchen (or really any meal kit delivery service) is that you can adjust how much sodium or spices you want to add to the meal. That’s another thing that I like about meal kits more so than delivery or takeout from restaurants.

That one thing…

The only thing I don’t like about Terra’s Kitchen is the number of plastic containers they send. According to their website, the FDA requires cut ingredients to be sealed in individually packaged containers. The company is actively trying to reduce the number of containers. Again, according to their site, they’ve recently started shipping lemons and limes without containers. We try to up-cycle and reuse the containers, but if we don’t, then we recycle them.

Other than that, I love Terra’s Kitchen and don’t plan to stop using the service any time soon! If you visit their website, new customers currently get $35 off their first delivery if they sign up for the Terra’s Kitchen email list.

How about you? Have you ever used a meal kit delivery service? If not, would you want to give it a try?

Continue Reading

Campfire pizza log


It’s almost Labor Day -a busy camping weekend- so I wanted to share one of my new favorite camping meals, a campfire pizza log!

Over Memorial Day weekend, we went camping at our favorite place to travel to and camp at, Shenandoah National Park. This time we went with a co-worker of mine and his family. We decided ahead of time to share some meals, so I started researching online different yummy meals for camping. I wanted to up my game since I was cooking for people other than my family!

One meal I came across was the campfire pizza log, but I couldn’t find a site that gave step-by-step instructions. Without instructions, we had to wing it, and we definitely have some lessons learned, which I thought I’d share.

To make the pizza logs, I used:

  • Refrigerated pizza dough (the kind you roll out from a can)
  • Pizza sauce
  • Pepperoni
  • Shredded cheese
  • Olive oil spray (okay, I didn’t actually use this, but I should have, and I will next time)
  • Nonstick foil

The logs are pretty simple to prepare. I made three large pizza logs (three cans of the refrigerated pizza dough), which is what you’ll see in my photos; HOWEVER, because the larger logs didn’t cook evenly, I recommend doing smaller pizza logs, so two logs from each can. I’ve written the directions below to reflect what I will do next time.

Directions for two small pizza logs:

    1. Cut two large pieces of nonstick foil. They should be large enough that you can completely wrap up the pizza logs. It’s better to cut them too big than too small. You can always trim off the excess with some kitchen shears or scissors!
    2. Have the nonstick side facing up off the counter (you’ll want the pizza logs on the nonstick side) and spray the nonstick with an olive oil spray or something similar. This will help keep the pizza log from sticking to the foil when you unwrap it after it’s been cooked.
    3. Before rolling out the pizza dough, cut the dough log in half. You’re going to make two smallish pizza logs from each can of dough.
    4. Place each piece of dough onto its own piece of foil.
    5. Roll out the pizza dough on the foil until each piece is in a rectangle.
    6. Spread the pizza sauce on top.
    7. Layer the pepperoni and cheese. (Obviously you can use whatever toppings you want.)
    8. Roll the pizza back up into the shape of a “log.”
    9. Fold the foil over top of the log and secure all the edges by rolling them in.

Camping Food

Camping Food
I didn’t do it, but cut this in half! Make two pizza logs from this sucker.

Camping Food

Corn and Pizza Logs
The smaller rolls to the left are pieces of corn on the cob. The three long rolls on the right are the campfire pizza logs.

That’s it! I actually froze ours in the freezer since we didn’t intend on eating them the first day of camping. Once they were frozen, I wrapped them in plastic wrap and put them in our camping cooler with ice. I was hoping that as the ice melted, the plastic wrap would help keep any water out of the logs, and it did seem to work.

Camping Food
The two longer rolls are the pizza logs. The small and medium rolls are corn on the cob.

When it was time to cook the pizza logs, we got a nice fire going, and then we placed the pizza logs on the flat griddle above the fire. As I mentioned above, the pizza logs didn’t cook evenly. The logs were getting a nice char in the center within 20 minutes, but these larger logs that I made were so long that the edges were too far away from the fire and weren’t picking up heat. That’s why I suggest making two pizza logs from each can of refrigerated pizza dough. That will get you a more evenly cooked pizza log, and they should be done around 30 minutes.

Camping Food
You can see that the center part of the pizza log is a little more cooked and charred than the edges. That’s why I recommend making smaller logs, so the edges can also reach the fire.

The cooking time is going to vary depending on how hot your fire is and the proximity of the pizza log to the fire, so keep that in mind. You’ll want to peel back the foil about every 10 minutes to check the logs. Use tongs to help you check safely, and if you wear fabric oven mitts … keep them away from the flames!

Camping Food
So tasty inside!

The three cans of refrigerated pizza dough ended up making enough pizza logs to feed 4 adults and 3 small children with leftovers. I also served up some fire-grilled corn on the cob.

Have you ever made a pizza log? What is your favorite camping food?


Continue Reading

Changing my diet

I think when a lot of people use or hear the word “diet,” they think of a short-term calorie or food restriction plan to lose weight. In this case I’m talking about changing my diet -permanently- for health reasons. I’ve mentioned before that my parents were health “nuts,” before it was trendy. I grew up without sugar or salt in the household. If I remember right, I was 9 years old when I had my first chocolate bar (soooo rich that I had a stomach ache!). When I grew up and moved out of the house, I still had the knowledge that my parents had given me on how to cook and eat healthy, but because of a busy work schedule and the single life, I started to eat poorly.

When I got married and had my son, my husband and I made the decision for me to stay home. So for 2 years I spent a considerable amount of time in the kitchen, cooking healthy meals from scratch for my family. Then I went back to work, and the processed foods entered our lives again. It’s been a struggle the last few months. For the most part, we have still eaten healthy meals, but we’re not doing as well as I’d like. I’d say we’re eating about 60% healthy meals and 40% not (that would be processed foods, fast foods, etc.). Well, maybe it’s better than that…but I want it to be 80% healthy (at least) and 20% not, and I know we’re not at that point.

On top of that, my best friend was diagnosed with lupus and started an autoimmune protocol (AIP) diet, which is similar to Paleo, and that got me thinking. I don’t have an autoimmune illness, but I am genetically predisposed towards them. Environmental factors (like diet) along with genetic predisposition can trigger an autoimmune condition. Talking to my friend and reading articles online (albeit, many of them are anecdotal…so there’s that to consider), I’ve decided to avoid certain foods, specifically, refined sugar, corn, soy, and wheat. Instead, we will eat a mostly plant-based diet with lean meats. If I actually had an autoimmune condition, I would avoid legumes and nightshade plants, but since I don’t…I’m just starting with the foods I listed above. I’m also continuing to eat dairy products and eggs.

Healthy, healthy, healthy

One challenge I face is cooking vegetables in a way that both Hubby and Little J will actually want to eat! Below is a photo of curly kale boiled in half water/half chicken stock, chopped onions, chopped garlic, salt, pepper, and crushed red pepper. I thought it was tasty, but they were not impressed. 🙁 Well, one day at a time.

And now I’m off to work on my shopping list!

Do you have any dietary restrictions, because of choice or necessity? What are your go-to healthy food choices? Or maybe some foods you try to avoid?

Note: The opinions reflected above are mine and may differ from yours. Before making dietary changes, please always consult your physician first!


Continue Reading