Review: Bib & Burp Cloth Set by Beautiful Burps

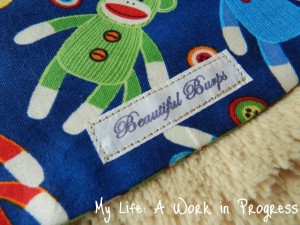
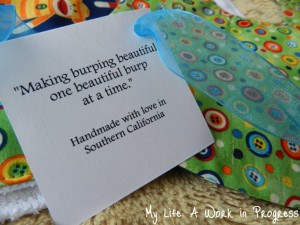
“Making burping beautiful, one beautiful burp at a time” is the motto of “Beautiful Burps,” a home business run by mom Courtney.

Beautiful Burps Logo

Beautiful Burps

I’m always excited to work with WAHMs (working-at-home moms), since they’re mothers like myself. I find keeping up with Baby J and the housework to be a challenge, but these women manage children, home, and business all at once. I admire them for that.

Courtney was born and raised in Newport Beach, Calif. She attended Corona del Mar High School and graduated from Hollins University. After marrying, she relocated to Chino Hills, Calif. Courtney began making burp cloths while pregnant with her baby boy (now an adorable 1 year old). She was asked by family and friends to make burp cloths sets. Many of them suggested she start her own business, so Beautiful Burps was born.

BB card
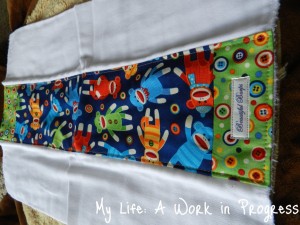
As burp cloths go, these really are beautiful. Courtney sent me a Sock Monkey Bib & Burp Cloth set to review, and I absolutely love the patterns and color coordination.

Click on Photos to Enlarge:
Bib & Burp Cloth set- Front
Bib & Burp Cloth set- Back
Bib & Burp Cloth set- Back (It’s reversible!)

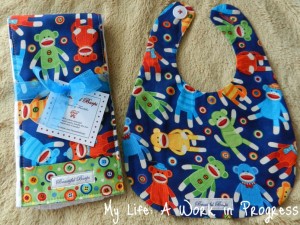
The reversible bib is made with absorbent 100 percent cotton and features a button closure.

Button closure
Button closure

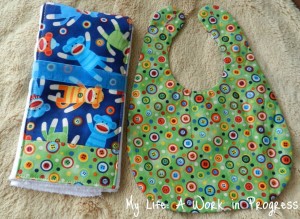
The burp cloth is made from a prefold cloth diaper, and it’s definitely the most absorbent burp cloth we have. If you’re unfamiliar with the different types of cloth diapers, the prefold diaper is made with several absorbent layers of fabric (cotton, in this case) sewn on top of each other. The middle of the prefold is the most absorbent part, since it has extra layers (usually 6-8), so this burp cloth really does soak up a lot of liquid!

Inside of burp cloth (made with a prefold cloth diaper)

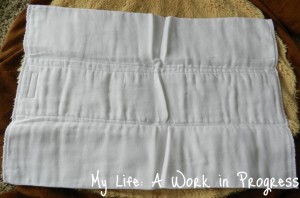
The outside of the burp cloth has fabric sewn down the center to decorate it/make it adorable!

Burp cloth outer
Outside of burp cloth
Our experiences:

The Bib-

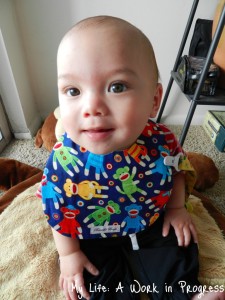
Although Baby J is nearly 8 months old and past the profusely spitting up stage, he has reached the drooling buckets of goo stage. From the moment he wakes up until PJs time again, he usually has a bib affixed to his adorable neck. I am able to use this bib for about four hours before the bottom layer starts to feel damp, and I switch it out with another.

Note: I usually remove Baby J’s bibs before going in public, because…frankly…most of his bibs are ugly. This sock monkey bib though, I leave on him when we go out, because it’s the cutest bib I’ve seen!

Baby J with his BB sock monkey bib

The Burp Cloth-

Courtney also recommends these burp cloths can be used as changing pads when on the go, as a blanket, or under a baby’s head while sleeping to protect from spit up or drool. I agree! We found multiple uses for our burp cloth. The burp cloth was wonderful for cleaning up drool, banana surprise and other solid foods, and the little bit of spit up Baby J still gets. It measures 14″x18″, so it’s a good-sized burp cloth.

This bib and burp cloth set appears well-constructed, and the stitching looks even. The pattern choice and coordination is perfect. They do exactly what they’re meant to do and very well. I think a set of these would be a beautiful addition to any mom and baby’s stash of necessaries!

Besides the bib and burp cloth set, Courtney makes and sells individual bibs, individual burp cloths, and burp cloth sets of three. She even has decorated onesies and cross over shirts available!

Visit Beautiful Burps on Etsy or at the new Web site HERE. Find Beautiful Burps on Facebook HERE. She’s also on Pinterest!

Courtney has graciously agreed to sponsor a prize for the Bellies to Babies giveaway hop event that starts this Saturday, January 5! Get a head start on your giveaway entries, by following Beautiful Burps on Facebook and Pinterest at the links above! 

Note: I received a complimentary bib & burp cloth set by Beautiful Burps to review and was not compensated for this post. I was not asked to write a positive review, and the opinions expressed above are my own and may differ from those of others.

Continue Reading

DIY: Christmas door wreath

The holiday season is a costly one, so I’ve been looking for ways to save money where I can. Last year my husband was deployed, so this will be the first Christmas our little family has together. I want it to be perfect! I understand, absolutely, that it’s not presents or a lot of bric-a-brac that makes Christmas a wonderful time…BUT…I’ll admit I have been enjoying putting decorations up and making our home “Christmasy.”

One way I’ve saved money is by putting together my own Christmas wreath for our front door. It’s not perfect, but I’m happy with the way it turned out!

I purchased a plain wreath from Michaels for $3 during a 50 percent off sale. I also used 10 small leftover ornaments from our tree and some extra gold fabric ribbon (on sale at Target) that I didn’t use up while wrapping presents. To secure the ribbon and ornaments to the wreath, I used ornament hooks that I’d purchased after Christmas last year at a discount. I estimate it cost me under $5 all together!

Click on Photos to Enlarge:

Here are my steps:

1. Fluff the wreath.

2. Determine how much ribbon you need.

*I did this by wrapping the ribbon around the wreath and placing the ornaments where I thought I’d want them.

3. Trim the ribbon. Leave some extra, if possible, for just in case.

4. Use an ornament hook to secure one end of the ribbon to the wire at the back of the wreath. Wrap the hook around the ribbon and wire, then twist the ends of the hook together tight.

5. Wrap the rest of the ribbon around the wreath the way you want.

*I’ll admit…this was difficult for me. I’m not super great at crafty things, and I tried for about 20 minutes, and I could not get the ribbon to look even, as you’ll notice in my photos. I finally gave up.

6. Secure the second end of the ribbon to the wire of the wreath.

7. Add the ornaments to the wreath. Secure them with the ornament hooks.

8. If you have enough ribbon, cut extra “tails” and secure to wreath with ornament hooks.

9. Use ribbon to tie a bow.

10. If you have a small piece of extra ribbon, wrap it around the center of the bow and secure at the back to make the bow more attractive.

Back of bow
Front of bow

11. Wrap the ends of two ornament hooks together.

12. Use this longer hook to attach the bow to the wreath.

You’re done!

Do you have any DIY holiday projects to share? Post the link in a comment below! I’d love to see it!
Continue Reading

CLOSED Giveaway: LooHoo Wool Dryer Balls Dec. 8-22 #clothdiapers

FluffStashBanner1Over the next two weeks I’ll be participating in some awesome giveaways as part of the New Year New Fluff Stash event hosted by We’re Parents?

This giveaway is sponsored by LooHoo Wool Dryer Balls. This Handmade in the USA company was started in October 2010 by a cloth diaper mama. Dryer balls are a wonderful alternative to dryer sheets. Made with felted wool, these dryer balls are approximately the size of a tennis ball and reduce static and drying times by up to 25 percent. They also soften clothes!

Although my hubby still likes dryer sheets in his laundry, I use dryer balls in all of my son’s cloth diaper and baby clothes laundry. That way I can ensure there’s no chemical residue touching my son’s skin. Dryer sheet residue on cloth diapers can also cause them to repel moisture…not a good thing!

You should start with three dryer balls, but the more you have, the better your results and the quicker your clothes will dry.

LooHoo Wool Dryer Balls is giving away one Starter Pack of 3 dryer balls (ARV $26.85). Open to the US and Canada. Enter to win below!

Note: My Life: A Work in Progress is not responsible for shipment of prizes.

Winner:
Entry #705 Miranda L.

Continue Reading