Review: BabyComfyNose Nasal Aspirator

As part of the Tomoson community, I received the BabyComfyNose Nasal Aspirator to review.

 BabyComfyNose
Stock Photo
About:

The BabyComfyNose Nasal Aspirator is a better snot sucker. Parents and caretakers use their own suction to remove nasal mucus from their little one’s nose. The nose tip fits into baby’s nostril without going to deep. Then the parent places the mouth piece in his or her mouth and creates suction. The cheek suction (best in short, repeated breaths), pulls mucus from the nostrils and back into the receptacle where it stays. Place a tissue in the receptacle beforehand to use as an absorbent, disposable filter.

BabyComfyNose
Stock Photo

Using a tissue is an effective filter against germs. The standard household tissue has pore size of 1/10,000 of an inch, whereas the standard pore size of open cell foam rubber is around 1/500 of an inch. Because tissue pores are about 20 times smaller than those of foam rubber, tissue is more effective as a filter.

This BPA-free device has been approved by Dr. James Sears on The Doctors show, as well as other physicians such as Dr. James Zinreich, John Hopkins Medical Institutions. Even celebrities like Angelina Jolie have expressed their happiness with the BabyComfyNose Nasal Aspirator.

Our Experiences:

It works! There’s no comparison between the BabyComfyNose Nasal Aspirator and a traditional bulb syringe. The BabyComfyNose works incredibly well with very little effort on my part. This last winter, Baby J had several colds. At the time, I researched the BabyComfyNose and the Nosefrida. The reviews for both were overwhelmingly positive, but I didn’t like the idea of purchasing additional replacement filters for the Nosefrida. With the BabyComfyNose I don’t need filters, but some of the negative reviewers on Amazon complained the snot collection area cracked or the pieces wouldn’t stay together or the snot would run back towards the baby’s nose. So I held off buying one. I truly wish I’d just gone ahead and purchased the BabyComfyNose a year ago. It would’ve saved us a lot of grief over the winter, because Baby J would’ve been able to breathe better. I had none of those issues that I read about.

We received the aspirator in the mail about three weeks ago (or more), but I held onto it a while before posting a review. It’s not that I wanted Baby J to get sick first -of course I didn’t- but I thought just in case he does contract a cold, I would wait until right before the agreed review deadline before posting. That way I could give a really thorough review of how the product actually works instead of just talking about it in general (basically regurgitating what the website says).

Well, wouldn’t you know, he ended up with a cold! Not a bad one, fortunately, but he had nasal congestion. I had the same thing, and I could just blow my nose. But poor Baby J is too young for that, so I whipped out the BabyComfyNose Nasal Aspirator to relieve his discomfort.

Review: BabyComfyNose Nasal Aspirator
We’ve never had good results with the traditional bulb syringe. When I used it in the past, I had to straddle him and hold him down, screaming, in order to use it. There never seemed to be a lot of snot collecting in the bulb, plus I was worried about how sanitary it was. With the BabyComfyNose, he still fights it. But he doesn’t scream; he laughs. Apparently it’s funny that Mommy wants to suck his boogers out? Even with the struggling, I found it pretty simple to use and fast. I could see the snot collecting in the receptacle. Gross but cool.

Here’s a picture of the snot I collected. See that goopy stuff? That’s snot.

Review: BabyComfyNose Nasal Aspirator

I want to make a couple of notes. The packaging for the aspirator is very minimal, which I like. It bothers me to see waste in product packaging. I also like the included mesh bag for storage. Because it’s mesh, the aspirator can air out. You don’t have to worry about whether or not it’s absolutely, completely dry before storing. The instructions online state to disassemble the aspirator to clean and use the dishwasher or warm, soapy water. You can even place it in the mesh storage pouch in the dishwasher, pull the entire thing out afterwards, and hang to dry. Some parents also boil the tubing or pour hydrogen peroxide down it. Don’t use a microwave sterilizer! I did this. Bad idea. I melted some of the tubing. Fortunately, it was only on the ends, so I cut them off, and the rest of the tube is still usable. I should’ve read the instructions first. *sigh*

The BabyComfyNose Nasal Aspirator is going on my “must-have” list for new parents. Can you survive without one? Yes, of course. But it’ll make your life so much easier!

Want to know more?

Visit the BabyComfyNose website, read their nasal aspirator comparison chart, and watch their video tutorial.

The BabyComfyNose is sold in stores across the US (the Whole Foods near me carries it), but you can also purchase online from sites like Amazon, Diapers.com, and Drugstores.com. They’re also sold in Canada and Australia. Prices vary. If needed, you can purchase replacement piece sets that include two nose pieces, two mouth pieces, and an extra tube.

Note: I received one or more of the products mentioned above for free using Tomoson.com. Regardless, I only recommend products or services I use personally and believe will be good for my readers. 

Opinions Expressed Pink Button

Continue Reading

Review: Nuby Bottle Drying Rack

One of my favorite parts about blogging is being a Nûby mom blogger. As a member of their program, they’ve sent me fun, useful products to try out and share my experiences with. My latest review is on the Nûby Bottle Drying Rack.

 photo NubyBottleDryingRack_zpsfdae0bbf.jpg

About:

Nûby’s pre-assembled Bottle Drying Rack holds eight bottles along with nipples, rings, discs, and caps. But the drying rack can be used with more than just bottles. It also works with different shapes and sizes of training cups and pacifiers. The pegs fold out of the rack and then lock into place. When you’re finished drying your bottles, fold the pegs back in. They’ll fold flat which is perfect for storage. The reservoir design holds in excess water, creating less mess for you.

A Nûby bottle and nipple brush is also included with this drying rack set. There’s a loop at the top of the bottle brush, making it easy to hang where you like. The nipple brush is stored inside the ventilated handle of the bottle brush. Just pull it out when you’re ready to use. Both brushes feature durable nylon bristles, but the bottle brush also has a sponge tip to clean those difficult to reach areas. The rack can lie horizontally or sit up vertically.

Our Experiences:

Baby J is finally doing awesome with his sippy cups, so I’ve moved all his bottles into storage. That doesn’t mean the drying rack is going to waste! I use it to dry parts for sippy cups, teething toys, and even small jars and containers I use for homemade baby food. Actually, I’ve even put spoons on there. Yup. If it fits, the drying rack is where it goes.
 photo 3cd8bc35-7b41-4214-9f8b-b5ac8996300e_zps68308adc.jpg
I use it to dry hand washed items, but I also use it for things I put through the dishwasher. To save money, we sometimes turn the dishwasher’s heated dry cycle off, which means all my dishes are still wet afterwards. Even if I use the heated dry, many of the sippy cups or spouts tend to hold a little moisture. I want them dry before they go into the cupboard, so I’ll move the cups to the drying rack for a day. I usually have the drying rack standing vertically, and I’ve never had an issue with it falling over, even when it’s not against the wall.

Here’s a tip: to save even more space, don’t lock the pegs in place and leave the drying rack standing vertically. Just fold the pegs down until you feel resistance, without locking them. That’s usually how I do it.

 photo FCA70D13-4E71-427F-9F49-794A701EFF0A-4181-000002DB2A878DEF_zps17307192.jpg

Find the Nûby Bottle Drying Rack at Amazon, Ideal Baby, and BabyHaven. Prices vary (pssst check out Ideal Baby).

For updates on new Nûby products, follow them on their social media accounts. They just opened a “Sip Sip Hooray” giveaway today!

If you liked my review, please consider voting for me at Top Mommy Blogs and the Picket Fence. Just click once HERE and HERE. Thank you!

Nuby Mommy Blogger

Nuby Mommy Blogger Disclaimer

Continue Reading

Review: Cloth Wipes and Ruby Moon Wipe Bits

*Updated Dec. 27, 2012

When I decided to cloth diaper, it seemed a no-brainer to use cloth wipes as well. In fact, I’m surprised when I occasionally hear of cloth diapering parents still using disposable wipes. After using, cloth wipes can be dropped straight into the diaper pail or wet bag along with the diapers, and then washed and dried together. Simple and inexpensive, no?

When I started, I wasn’t sure what kind of wipes solution I wanted to use. Some parents use plain water. Some parents buy pre-made wipes solution, and others make their own. Zany Zebra Designs has put together a great list of Cloth Wipe Solution Recipes. Reading some of the “natural” ingredients listed in wipe solution recipes, I was hesitant about choosing one. Even some natural ingredients can cause cloth diapers to repel moisture instead of absorbing. When in doubt, contact the manufacturers of your cloth diapers and ask them. Some babies can also develop a rash from the ingredients you use.

Initially, I used a simple solution of water with some witch hazel. My son never had a rash with it, but I also didn’t think I was getting him clean. After looking around online, I decided to try Ruby Moon’s Wipe Bits.

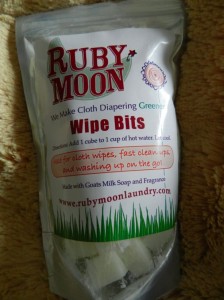
When I first opened this package, the wipe bits smelled so delicious, I wanted to rub them all over my body. No joke. I actually go into the laundry room throughout the day, just to smell them.

Hubby, on the other hand, does not like the smell of these, so it just shows that everyone has different tastes.

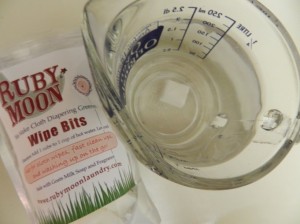
These wipe bits are made with goat’s milk soap and fragrance, and are easy to use. Drop 1 bit into 1 cup of hot water. I usually just pop a coffee mug filled with water into the microwave for a couple of minutes. If you do this, be warned…coffee mugs can be messy to pour. I learned this. Also be careful to not handle the solution while it’s still hot! I also learned this.

1 wipe bit to 1 cup of water

Once the wipe bit has dissolved, you’ll want to go ahead and pour the solution into your case while it’s still a little warm. If you wait too long, the soap will congeal, and you’ll have to heat the water again. If it looks like the soap is clumping together on the bottom, stick a spoon in and stir.

Some parents put their solution in spray bottles and use dry wipes with it. They can just spray the dry cloth or spray their baby’s bum. This is usually what I do for on the go (with a travel-size spritz bottle), but you can also just stick already wet wipes into a travel wipes case. I now wet wipes ahead of time and place into a travel wipes case. I found this to be easier when cleaning up messes on the go.

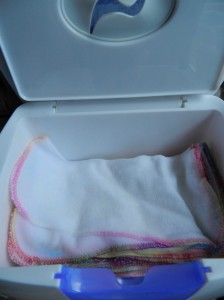
For at home, I place about 20 cloth wipes in our wipes warmer and pour the wipe bits solution over the wipes.

The first time I did this, I poured the solution just on top. Eventually, the solution did saturate the wipes all the way down to the bottom layers in the warmer, but they were never as wet as the top wipes. Since then, I split the wipes in half while adding solution. I pour half the solution over the bottom half of the wipes. Then I place the rest of the dry wipes on top of the wet ones and pour the rest of the solution over the top.

Every couple of days, in between adding new wipes and solution to the warmer, I flip the top of the warmer up and let it dry completely. This is to ensure I have no issues with bacteria growing in the warmer.

All the above may sound like a lot of work, but, honestly, it doesn’t take me long at all to do.

I was concerned at first that my son would be too soapy and that the wipe bits solution would leave a residue on his skin or irritate it, but this hasn’t happened. The wipe bits do a wonderful job of cleaning him; he always smells clean afterwards, even after his messiest messes! I’ve never felt residue on his skin left from these wipe bits. If you do feel that these bits are too strong, you can always add more water than 1 cup.

He’s never had irritation either, and I even use these wipes to clean his face! Now that’s not to say that your child may not experience sensitivities to these wipe bits. Unfortunately, every child is different in this aspect, but these bits are certainly gentler than disposable wipes.

Don’t use cloth wipes for diapering? You can still use wipe bits for wiping faces, washing hands, etc.

Want to give them a shot? Unfortunately, last time I checked Ruby Moon’s Web site, it looked like they were out of their wipe bits, but you can find them at the Cloth Diaper Outlet, $6.95 for a 5 oz. package.

Want to make your own solution? Visit Zany Zebra Designs’ recipe list here.

Note: This post contains affiliate link. I was not compensated for this review. The opinions are my own.

Continue Reading