If you were to look at a catalogue of my family’s dinner menu over the last year, you wouldn’t find many meals appearing more than twice. Generally, I make something once, and if we don’t absolutely love it, I don’t make it again; if the dish is fantastic and we couldn’t get enough of it, I’ll make it again, but after that second time, I’m usually already on the prowl for the next new thing I never knew I was missing, and the aforementioned meal is promptly tossed aside and forgotten somewhere in the shadow of a newer, more exotic dish.
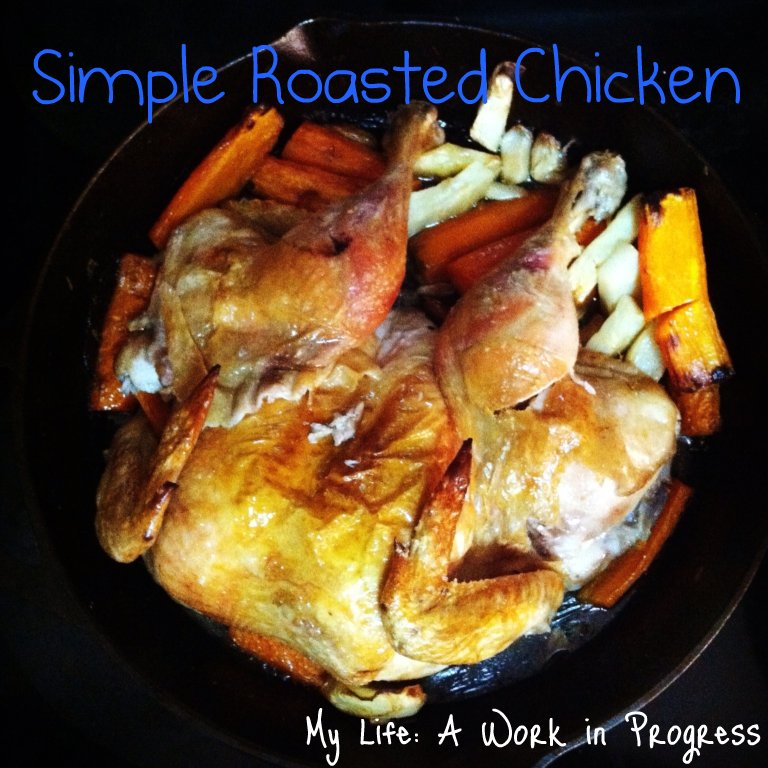
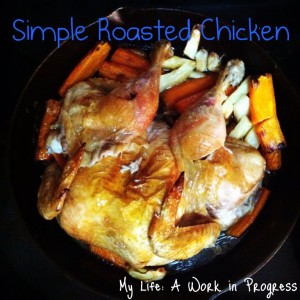
Fickle as I may be, everyone has a few meals to which they just keep coming back. Reasons may vary, whether they be convenience, taste, or tradition, but I am no different in that I have a fallback meal that I make once a week, almost without fail, and its simplicity may be surprising to those of you who know me and my predilection for non-American, non-European fare. It may sound downright boring, but my ideal quick weeknight meal is nothing more than roasted chicken on a bed of roasted vegetables. Sure, it may see dozens of iterations in my oven, whether it be a decidedly French preparation of chicken on a bed of tiny potatoes, slathered in compound butter, or a Moroccan twist with roasted chickpeas tossed in cumin, coriander, and harissa, but more often than not, it’s a simply seasoned bird on simply seasoned vegetables that takes almost no effort to make and can be on the table in an hour. To me, it’s the epitome of comfort food, and on days like today when I am on day three of having two sick children and a sick husband on his way home from work, it’s great to have a back-pocket dish that everyone loves that will still leave me time to tend to my family’s needs and keep my sanity intact.
And yes, you read that correctly: succulent, burnished roasted chicken with schmaltzy* roasted vegetables, on your table in an hour. While the French may like to raise the art of roasting a perfect chicken to the culinary equivalent of walking on water, it isn’t as difficult as they would like you to think. Roasting a bird in its original shape is fairly straightforward, but it tends to freak people out a little bit, and a lot of people end up with dry breast meat because they want to be sure that the legs and thighs are thoroughly cooked and end up cooking it longer than necessary. That, combined with the fact that a bird in its original shape doesn’t cook very quickly, is why I prefer to spatchcock my bird before cooking it. You’ve probably seen this done before under the name “butterflying,” but telling your guest that you spatchcocked the chicken makes for a much more interesting ice breaker, so we’ll go with that. Essentially, all you are doing is removing the chicken’s backbone and flattening the bird out so that the legs, thighs, and wings surround the breast meat. The increased surface area means that your bird will cook more quickly, and the dark meat takes the brunt of the heat while the breast meat is relatively protected. For maximum flavor and juiciness, it is good to use the best bird you can afford, but this isn’t meant to be a splurge, so buy what is comfortable for your budget.
If you are planning to spatchcock chicken on a regular basis, I would recommend purchasing a pair of poultry shears. They’re inexpensive and make quick work of removing the backbone- I have actually done this with shears in one hand while holding a baby in the other arm on more than one occasion- but if you don’t want to buy shears, then a sharp knife will do. Simply use your knife or shears to cut the backbone out of the bird, then flip the bird over and flip the leg quarters up so they are against the bird. Tuck the wings under if you want, and there you go: a spatchcocked chicken. If you think a visual aid would help, here you go.
Now, grab whatever root vegetables you’ve got and peel them, then cut them into pieces the size of medium-large baby carrots. Lately, I’ve also been taking ten or twelve cloves of garlic and peeling them, then tossing them in with the vegetables, because little nuggets of sweet, caramelized garlic are fantastic. Toss the veggies with a touch of olive oil and salt, then spread into a single layer in a cast iron skillet (or whatever roasting pan you normally use) and plop the chicken on top, breast side up. If you want to maximize caramelization for the vegetables, put the chicken in the pan first and then snuggle the vegetables into the pan around the chicken. That way, nothing is hiding under the chicken and all your veggies get the appropriate exposure to caramelize. Sprinkle the chicken generously with salt, then pop it into a 450 degree oven for 45 minutes to an hour. You’ll know the bird is done when you pierce the thickest part of the thigh and the juices run almost clear, though once you’ve done it enough, you’ll be able to tell just by nudging the leg and seeing how it feels at the joint or by seeing how much resistance the meat gives when you lightly press it. Once the bird is done, remove it from the oven and let it rest for fifteen minutes or so before cutting into it. Just like eggs, meat continues to cook once the heat source is removed, so let that carryover heat do its job. Resting also helps ensure a juicy bird, so don’t skimp here. Generally, I take the bird out of the oven and put it on the table with a simple salad on the side, usually something with a sharp vinaigrette to cut through the richness of the chicken. By the time everyone is at the table with plates, knives, and cups in place and we have prayed, enough time has passed to start eating.
Once you can confidently roast a chicken, the variations on the theme are infinite, but however you season it, not much tops a perfectly roasted chicken. My husband and daughter look forward to seeing what incarnation our chicken has taken each week, but we are all just as happy when I make it as described above- simple enough to let you get it in the oven and then get on with all of the other things pulling you in different directions. Happy cooking!
*“schmaltz”= chicken fat
About the Chef:
Nicole Muvundamina at The Fresh Kitchen teaches in-home cooking classes in the Hampton Roads area. She works with home cooks of all levels, but has a soft spot for moms who feel completely clueless in the kitchen. Her goal is to take the intimidation out of cooking and make it fun and approachable for newbies, and to get people who already know their way around the kitchen to step out of their culinary comfort zones and try something new! Follow The Fresh Kitchen on Twitter @TheFreshKitchen and Facebook: TheFreshKitchen.