
Disclaimer: I’m going to talk about some of my recent hair dye experiences, but I’m not a professional. If you use any products I write about or follow any of the steps I took, I can’t predict your outcome, but here’s how I dyed my hair red at home:
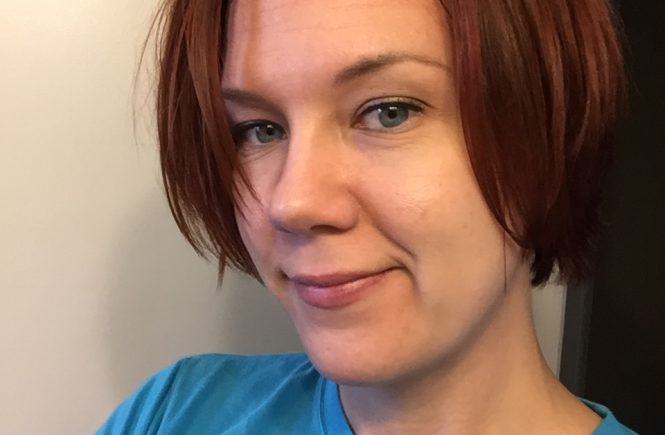
Although it’s been several months since I’ve had red hair, I thought I’d go ahead and post about it. When I was researching dyeing my hair red at home, I couldn’t find a lot of posts that showed pictures of women with light or medium brown hair going red, which was a bit frustrating. Maybe this post will help give someone a little scope on the colors.
BACKGROUND:
I’ve dyed my hair red five times at home now. The first time was not good (I’ll explain in a minute). The second time was okay. The third time? Perfect! The fourth and fifth times were upkeep, and then I decided to go back to brown, which is what I have now.
I had been toying for months (maybe longer) about dyeing my hair red. I had a reddish-brown thing going on fall of 2014 for a couple of months before I went to brown and blonde highlights. When I was in high school, I went through a henna stage, so I knew that red was a good color on me. That wasn’t an issue. It took me a long time to go back to red because I wasn’t sure what color, and I also didn’t want to pay money at a salon. I knew that if I wasn’t going to go to a salon, I’d better know what I was doing.
Well, the first time I tried last year, I still didn’t know what I was doing. That’s because I did it kind of on a whim. I mean, yes, I’d been thinking about it for months, but the day that I went back to red was just a random day that I said, “Okay! I’m going to do it!” while I was at the store, walking by the hair dye aisle. So I didn’t really think that through. Don’t do that.

The instructions on the dye box said to apply the dye to my roots first and then the rest of my hair. I learned the hard way that, that was completely opposite of what I needed to do. My roots were “virgin” hair, whereas the rest of my hair had medium brown dye on it. I ended up with “hot roots,” which means they were significantly brighter than the rest of my hair. I also didn’t get the dye on evenly, so I ended up with uneven brown sections and red sections as you can see in my hair below. Not a good look.

After that, I started buying L’Oreal’s CHROMA True Reds dye and a bottle of developer from my local Sally Beauty Supply. I also bought a little bowl with measurement markings and a extra-wide brush, and then a bunch of upkeep-type items since I’d read that red hair fades easily.
Here’s what I bought from Sally’s, and it looks like a lot (and it is), but with some sales going on, it cost me less than $50!
- L’Oreal Technique CHROMA True Reds in 3RV CHROMA CHERRY
- L’Oreal Technique Oreor 20 Volume Creme Developer (If you have darker hair, you’ll probably need at least 30)
- Hair Color Mixing Bowl
- Extra Wide Jumbo Tint Brush
- Regular Tint Brush
- Hair Color Mixing Whisk
- Rattail Comb
- Quantum Riveting Reds Color Replenishing Shampoo
- Quantum Riveting Reds Color Replenishing Conditioner
- Ion Moisture Miracle Leave-In Conditioner
- SalonCare Shorty Section Clips
- SalonCare 2 Black Reusable Gloves
- Ion Color Intense Moisture Conditioner (2 sample packs)
- Ion Repair Solutions Effective Care Treatment (sample pack)
- Ion Color After-Color Sealer (sample pack)
I also went to Ulta and bought the following, which cost me about $15 (my receipts are long gone, so I’m guesstimating here).
- Love for Hue Color Care UV Protectant Spray
- Batiste Dry Shampoo in Blush

I treated my hair first with the intense moisture conditioner, and then I used my blow dryer to dry my hair. After that, I followed the directions on the box for the CHROMA dye and mixed it with the developer in my mixing bowl. I alternated between the two different-sized tint brushes, but I ended up using extra-wide brush the most. It just made the process go faster.

I purposely put the dye on the brown sections of my hair first. I knew that those spots would need to process a little longer than the rest of my hair.

I waited about ten minutes before I started dyeing the rest of my hair. I know some people put Vaseline around their hairline to keep the dye off their skin, but I didn’t bother. It was easy to take off after the fact with shampoo.

I let the dye sit on the rest of my hair for about 20 minutes, and then I rinsed. Here’s the key with bright red hair dye though: don’t rinse your hair until the water is clear. You have to rinse until your the water is running pink, and that’s it. And every time you wash your hair, you’ll lose some of the dye. That’s why I would use the color replenishment shampoo and conditioner. They are a red shampoo and conditioner that add color every time I would wash my hair.

I loved my time with red hair, but the upkeep was a lot of work. Besides using the color replenishment shampoo and conditioner, I only washed my hair every 2-3 days. I used dry shampoo in the meantime to keep my hair looking fresh. It worked. My hair stayed very bright right up until I needed to dye my re-growth, but it was time consuming, and I went through a lot of product. I’ve since gone back to brown, and I used Color Oops to do so. I’ll write another post detailing how that went.