Use a MIRA digital kitchen scale for portion control (Review)

Disclosure: I got this product as part of an advertorial.

I was sent two MIRA kitchen scales to review -one glass and one stainless steel. My plan was to give one to my sister-in-law, an avid baker, so she and I could give different perspectives about the scales. She lives two hours away, and getting up there just has not worked out. First we all had norovirus, then she had the flu, and we had a winter storm. Now everyone is well, but an even bigger storm is hitting the area, as I’m typing this. So I’ll be reviewing both scales in two separate posts with different angles…just to show you that there is more than one reason to own a kitchen scale!

A couple of days ago, I had a conversation with a friend about portion sizes. We came to the conclusion that the portions you eat (and serve your family) affect two things- your wallet and your waistline.

It’s no secret that America has a weight problem. More than half the US population is overweight. According to the CDC, more than one-third of adults are obese. Shockingly, almost 17 percent of adolescents are also obese. Some of the leading causes of preventable death -heart disease, stroke, type 2 diabetes, and certain cancers- are often conditions related to obesity.

Sure, many foods Americans eat are nutritionally deficient, genetically modified, and full of artificial ingredients and preservatives. And probably a lot of people don’t get enough exercise, either. I know these factors all affect our health. But it’s still obvious that we eat too much as a country.

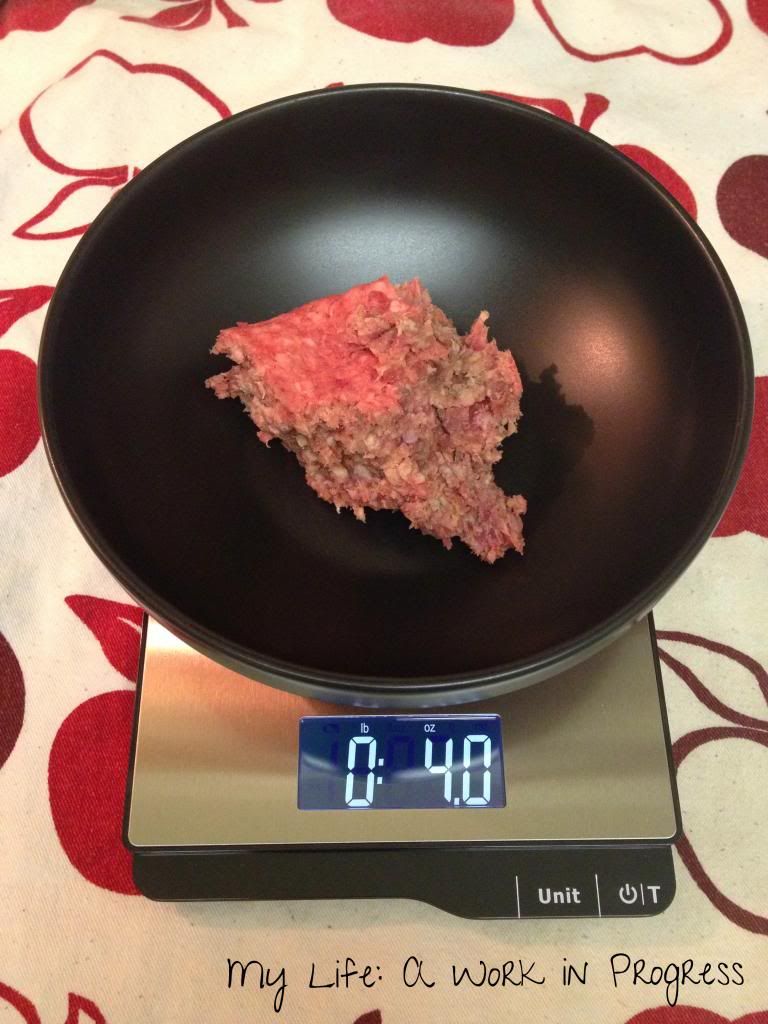
I was shocked (and really depressed) when I used my MIRA scale to measure out 4 ounces of raw ground beef. I had no idea a proper serving was so small! (It definitely puts a 16 ounce steak into perspective.) Keep reading to see the photos.

Weighing your food to determine portions is a great idea whether you’re trying to lose weight, gain weight, or maintain. Keeping the proper serving sizes also ensures you’re getting the right amount of nutrition- it’s not all about calories!

Finally, if you’re eating less on a regular basis*, you’ll buy less; therefore, you should end up spending less on food. Simple math!

*I want to make it clear that I’m not advocating starving yourself to save money! I’m just pointing out that when I started eating recommended serving sizes, I ended up spending less money on food.

The MIRA scale I’m reviewing today is their stainless steel model -ST 125. It’s sleek, thin, and takes up very little drawer space in my tiny apartment kitchen. I used a tape measure, and the platform is about 8.75 inches long and 6 inches wide. Amazingly, the scale can weigh up to 11 pounds. I tried putting one of my cats on it to test that claim, but she wasn’t very cooperative. It has a 2-year manufacturer warranty and takes lithium batteries (they’re included). The tare function is awesome, as I’m about to explain.

In a nutshell, the tare function allows you to zero out whatever bowl or container you have on the scale, so the scale won’t take that container’s weight into account when you start putting food in it- the scale will only weigh the food.

You can turn on the scale, place your container on the platform, and hit the power button one more time. This enables the tare function, and you should see the scale go back to “0.” The other way to do it is to put the container on the platform, and then turn the scale on. It’ll immediately revert back to “0.”

To adjust the units, just click the “unit” button. The scale weighs grams, millilitres, ounces/pounds, and fluid ounces. In the photo above and below, I have it set at pounds and ounces, so I can weigh ground beef.

A serving size of ground beef for an adult is 3 to 4 ounces. I went with 4, since I’m trying to build more muscle. I’m going to admit; I’m really depressed at how TINY an actual portion of meat is. If I hadn’t weighed the beef, I would’ve ended up eating at least two servings.
Measuring cups and spoons are not as accurate as scales. You can read about it here on this PBS food blog, but basically, particles of food are all different sizes and weights. That will even changed from raw to cooked, and there’s air around many pieces of food. The 4 ounces of ground beef that I’d measured turned into about 3.4 ounces after I cooked it.

I read online that a serving of cooked quinoa is 185 grams or about 1 cup, so I used the scale to weigh 185 grams. Then I took the 185 grams that I’d weighed and put it into the measuring cup. Look at how much I had still left in the bowl! So if I’d gone by a measuring cup I would have eaten less than the proper serving of quinoa.

I’m surprised scales aren’t more prevalent in American kitchens, especially when baking (more about that in the next post). It’s also coming in incredibly handy for portion-control, and I think it will really help me in my goal to trim up and build more muscle.

(Affiliate link>) The MIRA stainless steel digital kitchen scale is on sale right now at Amazon for $29.99.

So what do you think? Do you have a kitchen scale? Would you use one?

Note: I received one or more of the products mentioned above for free using Tomoson.com. Regardless, I only recommend products or services I use personally and believe will be good for my readers.

Opinions Expressed Pink Button

Continue Reading

Four “SUPER” Bowl Dips- Recipes for the Big Game #Superbowl #football

Thank you to my co-writer, Ruth, for her second post on My Life: A Work in Progress! -Elisebet

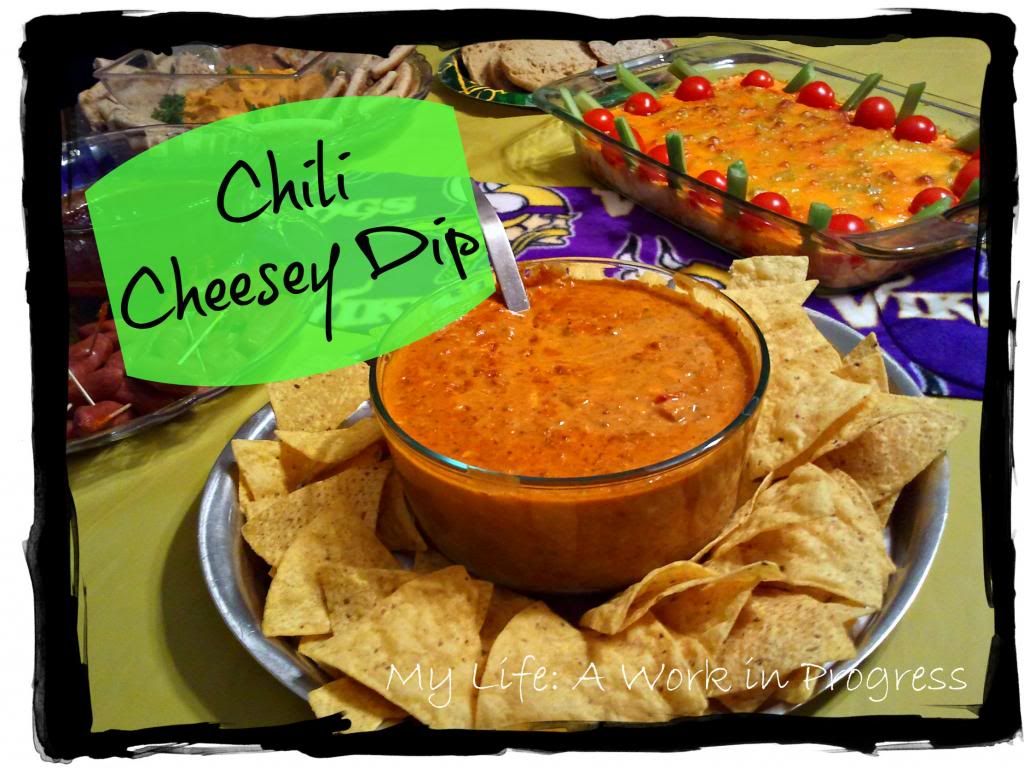
It’s that time of year again. Football fans, whether it’s their team or not, are excited about THE big game. Not a fan? Doesn’t matter—someone in your family or office is. Food for THE BIG game? It’s got to be filling and tasty, and there better be plenty of it. Preparation needs to be simple, and it must be easy to eat in front of the big screen. Here are four fabulous, family-favorite bowl dips that meet all these requirements for THE BIG GAME.

#1 CHILI CHEESEY DIP

Ingredients:

  • 1 can (15 oz) chili without beans
  • 1 can (15 oz) tamales
  • 1 can (10 oz) diced tomatoes & green chilies
  • ½ lb. processed cheese (Velveeta or generic)

Steps:

Put contents of the canned chili and tomatoes/green chilies (including liquid) into a slow cooker. Remove the paper from the tamales and mash with a fork. Add to the slow cooker mixture, including the liquid from the tamale can. Cube the cheese and mix into the slow cooker contents. Cook on high for about one hour (or low for longer) until the cheese is melted; then keep on warm until serving with your favorite tostada or taco chips on the side.

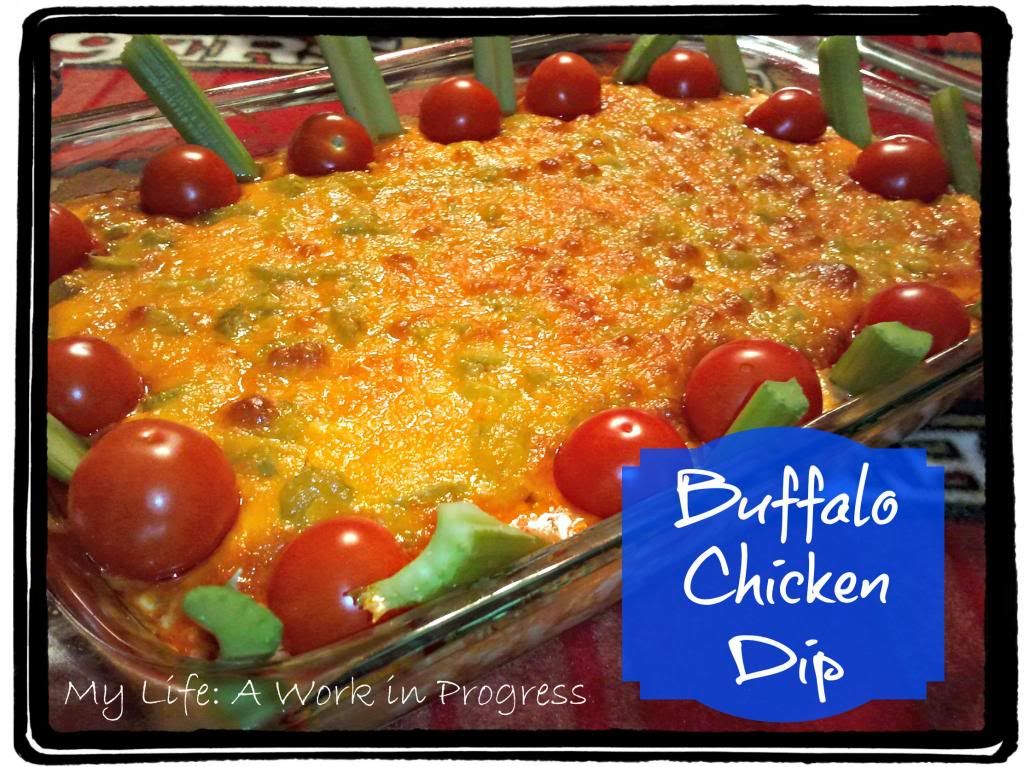
#2 BUFFALO CHICKEN DIP

Ingredients:

  • 2 boneless chicken breasts
  • 1 (12 oz) bottle of hot sauce (I always use Frank’s Original Red Hot)
  • 2 (8 oz) packages of cream cheese (I use lite or Neufchâtel)
  • 1 (16 oz) bottle of ranch dressing (I use lite)
  • 1 cup of finely chopped celery
  • 8 ounces (2 cups) grated Cheddar Cheese (or Colby or Monterey Jack)  (I like sharp Cheddar)

Steps:

Boil and shred the chicken breasts. (This can be done a day or two ahead of time and refrigerated until assembling the dip for baking.) Combine the cream cheese and dressing in a sauce pan, heating until smooth. Place shredded chicken in the bottom of a sprayed 13x9x2 pan and cover with the hot sauce—mixing it into the chicken. Pour the cream cheese mixture over the chicken/hot sauce layer. Layer the chopped celery next and top with the cheese. Heat in a 350 degree oven for about 30 minutes until the cheese is melted and mixture bubbling. Serve with celery sticks, crackers, and sliced baguette bread.

Variation:  If you like blue cheese, use 1 cup ranch and 1 cup blue cheese dressing instead of the bottle of ranch.

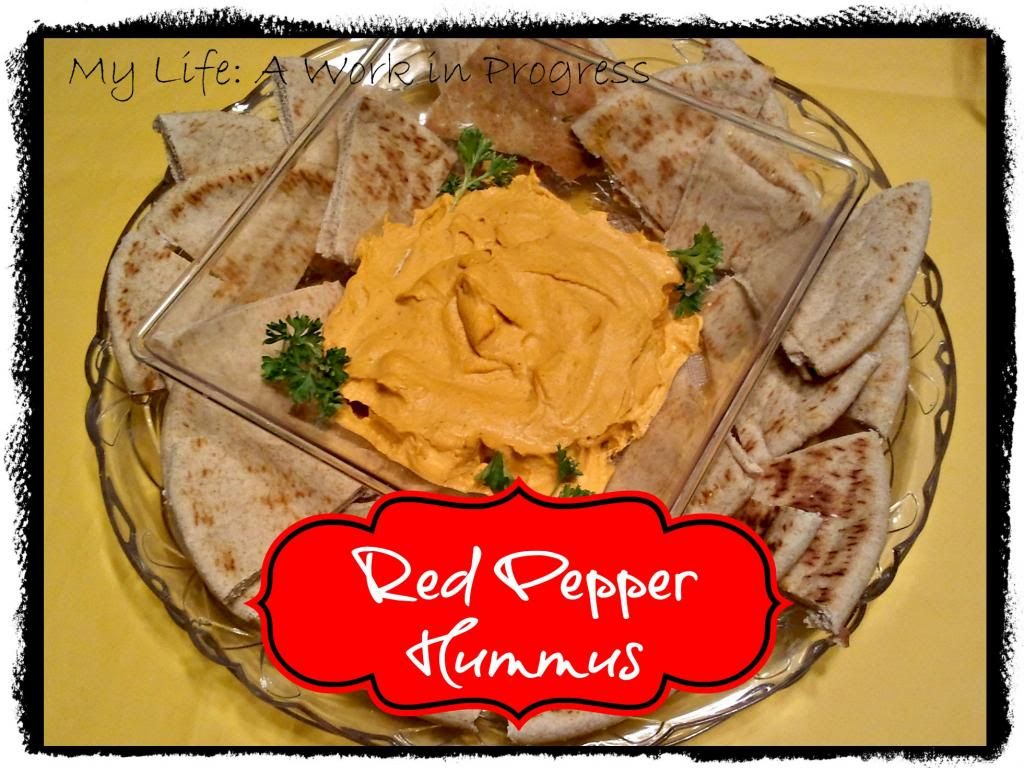
#3 Red Pepper Hummus

Ingredients:

  • 1 can (15 oz) garbanzo beans (chick peas), drained  (if you cook your own beans, you will need 2 cups cooked)
  • ¼ cup tahini
  • 4 tablespoons lemon juice (juice of about 3 lemons)
  • 2 tablespoons olive oil
  • 2 cloves garlic
  • 1 teaspoon cumin
  • ½ jar (12 oz) of roasted red peppers (if you roast your own—2 red peppers)
  • 2 tablespoons parsley
  • Salt & pepper to taste

Steps:

Puree ingredients together in a food processor or blender. Add salt & pepper to taste; add more lemon juice if needed for tartness.  (It will thicken slightly when refrigerated.) Best if chilled several hours or overnight before serving, so make it ahead! Serve with pita bread cut into triangles.


#4 Sweet and Saucy Dip

Ingredients:

  • 1 jar (12 oz) grape jelly
  • 1 jar (12 oz) chili sauce

Steps:

Empty contents into a sauce pan and heat (medium) until jelly is melted into the chili sauce, stirring as needed. This can also be made in a slow-cooker. Serve with meatballs and little smokies (cocktail wieners).

 What are your favorite game-day dips?
Continue Reading

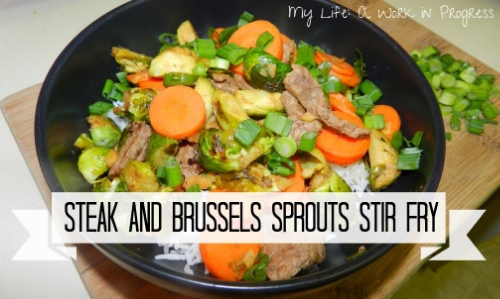
Steak and Brussels Sprouts Stir Fry #hellofreshpics

Subscription boxes are a popular service right now, and I know they exist for all kinds of products- cat toys, organic samples, underwear, makeup, and more. But I was surprised to hear about Hello Fresh, a food subscription service! Through the Mosaic Reviews team (who, alas, are closing their doors soon), I received one complimentary Hello Fresh box, delivered to my door.

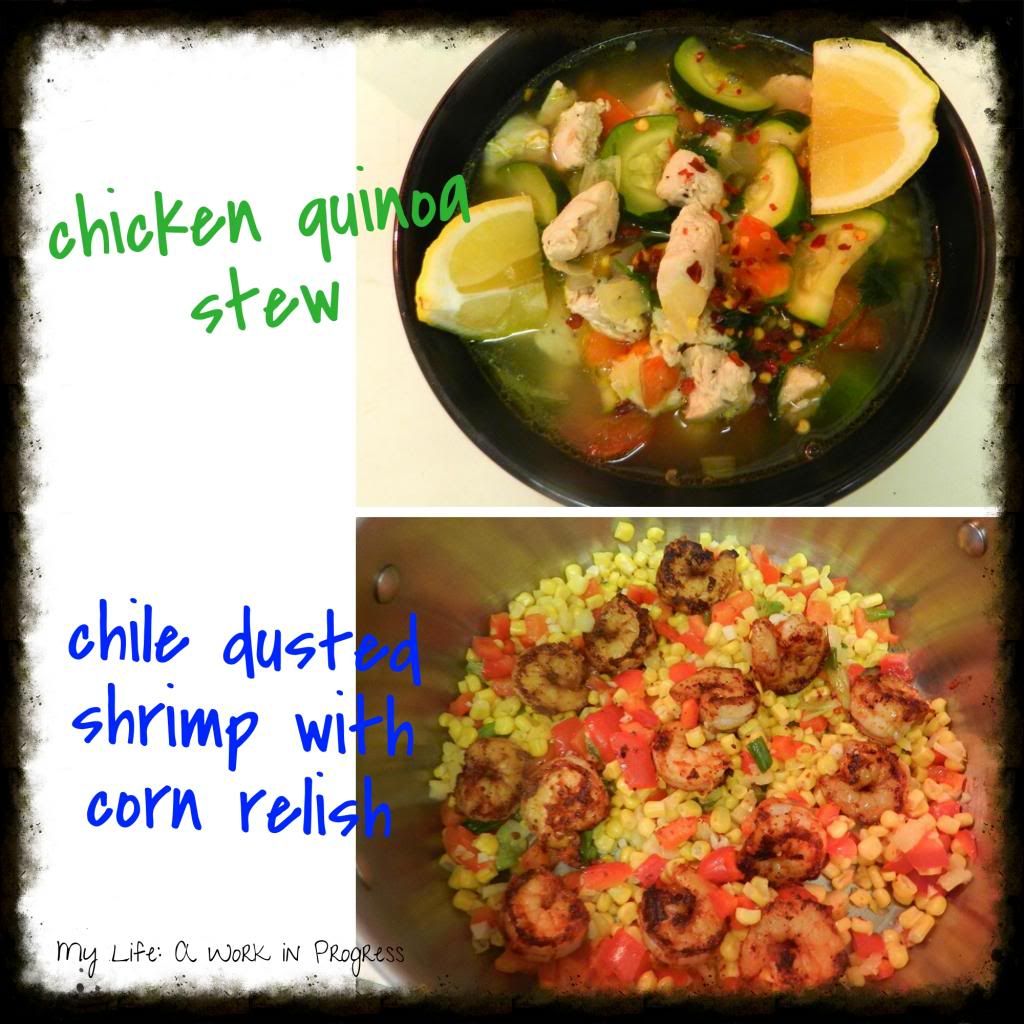
The classic box contained recipe cards and ingredients for three meals (two servings per meal). The meals were: steak and brussels sprouts stir-fry, chicken quinoa stew, and chile dusted shrimp with corn relish. Since the steak and Brussels sprouts were my favorite of the three (soooooo good), I’m sharing the recipe below.

Steak and Brussels Sprouts Stir-Fry

 Ingredients:

  • Sirloin strips- 8 ounces, uncooked
  • Basmati rice- 1 cup, uncooked
  • Carrot- 1 large (about 7″ long)
  • Garlic cloves- 2
  • Ginger- 1 thumb (about 5 or 6 tablespoons)
  • Jalapeño- 1
  • Scallions- 2
  • Soy sauce- 2 tablespoons
  • White wine vinegar- 2 tablespoons
  • Vegetable oil- 2 tablespoons *Not included in Hello Fresh box

Directions:

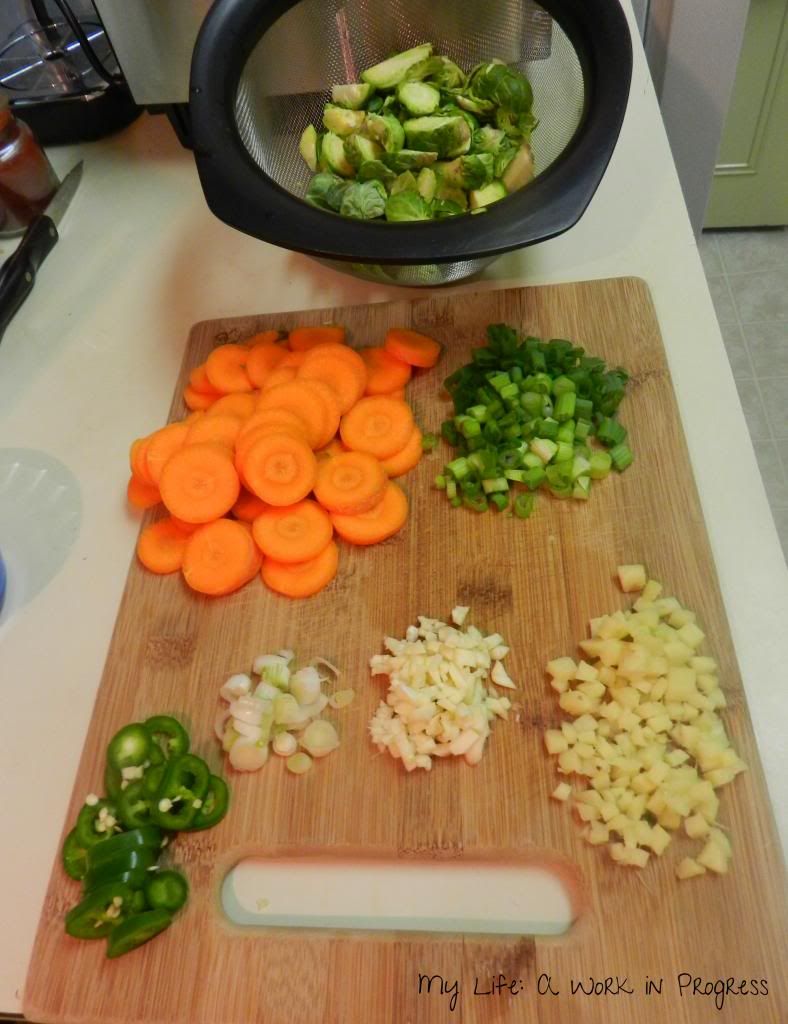
Step 1- Quarter the Brussels sprouts. Peel the carrot and slice diagonally. Slice the scallions. Separate the white from green parts. Thinly slice the jalapeño. Mince the garlic and ginger.

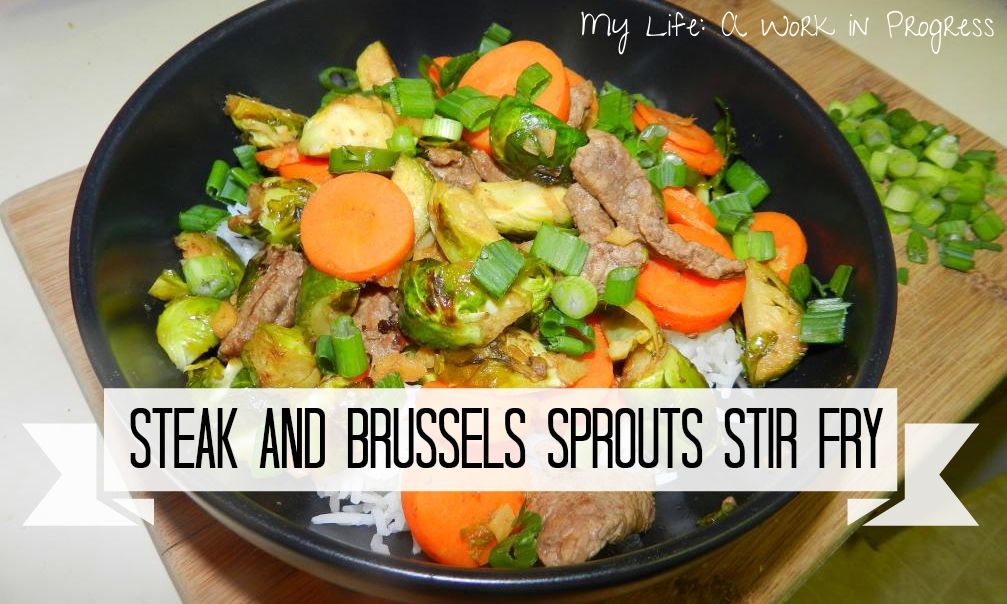
Steak and Brussels sprouts stir fry from Hello Fresh. Get the recipe on My Life: A Work in Progress

Step 2- Combine the soy sauce and vinegar in a small bowl, then set aside.

Step 3- Bring 1 1/2 cups of water and rice with a pinch of salt to a boil. Reduce heat, cover, and cook for 20 minutes, or until tender.

Step 4- Heat a tablespoon of oil over medium high heat. Saute Brussels sprouts, turning occasionally, until golden brown and crisp tender, about four minutes. (I cooked mine for longer…just look for that golden brown color.) Move Brussels sprouts to a small bowl.
Step 5- Add another tablespoon of oil to the pan, season the steak with salt, and cook steak strips in a single layer. Cook approximately three minutes, until browned and cooked almost all the way through. (Like the Brussels sprouts, I cooked a little longer…just to make sure they were done, since I was giving some to Baby J.) Move steak to bowl with Brussels sprouts.

Step 6- Add ginger, scallion whites, and garlic to the pan. Cook until fragrant, about one minute. Add carrots and jalapeño. Cook an additional three minutes, until carrots are softened.

Step 7- Add steak, Brussels, and soy & vinegar mixture to the pan. Continue cooking a few minutes until the sauce is thickened.

Step 8- Fluff rice with a fork and serve steak and vegetable mixture over a mound. Garnish with scallion greens.

Steak and Brussels sprouts stir fry from Hello Fresh. Get the recipe on My Life: A Work in Progress

It seems like a lot of steps, but the preparation and cooking actually went quite quickly. It’s just really broken down simply for anyone to follow!

The combination of the steak and Brussels sprouts was really nice. The sprouts weren’t bitter at all. I usually cook with brown rice, but I love the texture of Basmati rice, so this recipe did not disappoint. A nice compromise would be brown Basmati rice (not as fluffy as the white, IMO, but close!). The steak was absolutely delicious- tender and flavorful. I plan to recreate this recipe, and when I do, I’ll make sure to purchase a good-quality sirloin, because I think that really makes the dish.

I also thought the portions were huge. The photo above is a bowl for one person!

About Hello Fresh

I chose the classic Hello Fresh box, but there’s also a veggie box. You can choose a box for either two people or four, and also make meal substitutions when checking out online. It’s a flexible subscription service, meaning you can place your box on hold for however long you want. Check out the FAQ page on their site for specific details.

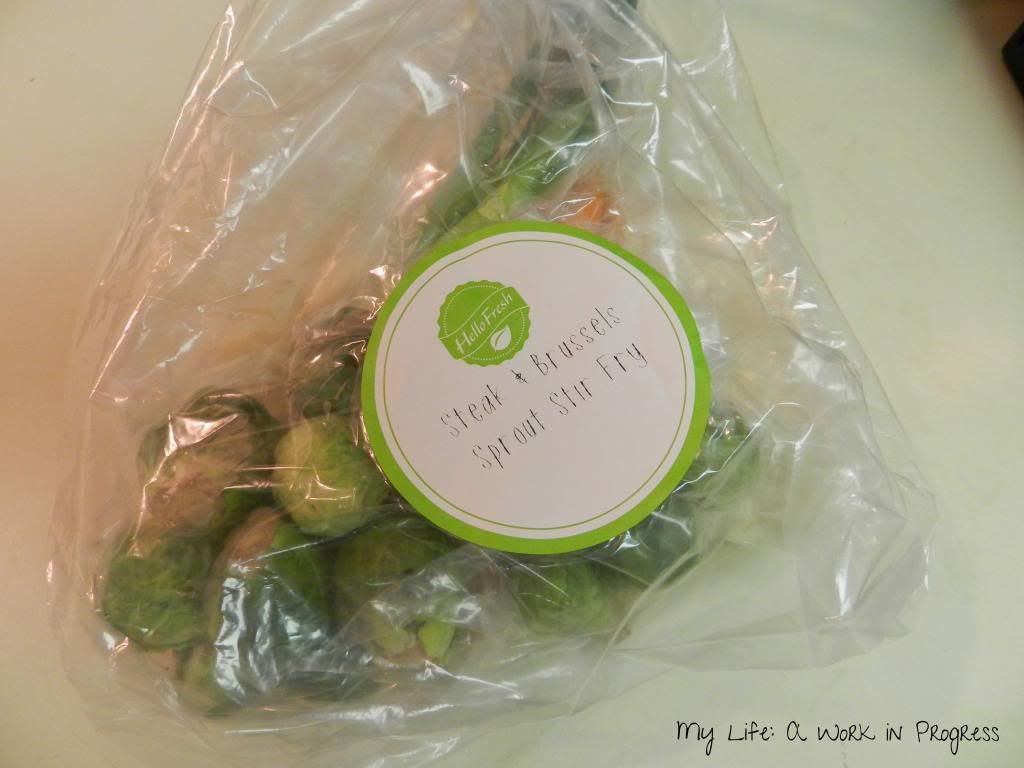
My box arrived mid-morning on the day it was scheduled. The packing inside the box kept the ingredients cool, including the meat. Everything was pre-measured and packaged together, so it was impossible to mix up meals. All the veggies looked as fresh as if I’d bought them from the grocery store that day.

Veggies for the steak and Brussels sprouts dish

As I mentioned, the steak/Brussels sprouts meal was my favorite, and I plan to make it again, exactly as written. The chicken quinoa stew and shrimp/corn relish dishes were also good, but I’ll make some changes next time. I cook with quinoa at least twice a week, and I enjoy the chewy, nutty flavor and texture. I felt that putting the quinoa in a stew negated the nice texture, almost like wasting the quinoa. When I recreate this recipe, I’ll leave the quinoa out and probably use some lentils in the stew instead. The shrimp with corn relish dish was also good, but I always feel like a meal’s incomplete without some sort of starch, so I added brown rice. The addition of rice also stretched the meal further, making more portions.

Hello Fresh food subscription. Find out more on My Life: A Work in Progress

So will I be continuing my Hello Fresh subscription? Probably not at this time, but I’m torn about it. I’m still signed up for the subscription service, but I have deliveries placed on hold until I make up my mind. I was very happy with the quality of the food, the portions, and the recipes. It just doesn’t makes sense for us, financially. I try to spend around $2-4 per person on a meal, and Hello Fresh averages out to $11.50 a meal, per person. I do think there’s at least an extra serving for every meal, but that would still make it about $7.66 a meal, per person. However, take a look at the $20 off coupon code at the bottom of this post. Using a code like this one would definitely make at least trying out a box affordable!

If you have the food budget for it or disposable income, then I would recommend giving Hello Fresh a try. It’s nice that you can try new recipes, and maybe use ingredients that you wouldn’t normally. You can also do so, without buying a bunch of expensive spices that you may never use again. I could see Hello Fresh being indispensable to a busy, young professional or a newly-married couple. When I was working full-time for the Army Reserve and living out of a hotel, a Hello Fresh subscription would’ve been fantastic (and definitely healthier than eating out). It is something I’m going to keep in mind for when we have another child, because it’s occurred to me this would be awesome to have delivered a couple of times that first month after giving birth!

You can check this service out at HelloFresh.com. Use code UQRX9L to receive $20 off your first box! And if you use it, I’ll get $20 off my next box too. Sign up, and you get your own referral code to share too.

To see what other Mosaic reviewers had to say, click HERE.

General Disclaimer- Floral

Continue Reading