UPDATED 11/19/13- Nicole Elizabeth is launching a new website soon! In the meantime, I don’t have access to the photos for this recipe, so the links were broken. I will hopefully be able to add them back in eventually, but the recipe is still accessible below. You can check out Nicole Elizabeth’s new Facebook page HERE.
Over the last couple of years, I’ve heard comments from students and friends that paint a picture of how they imagine my life in the kitchen must be. Their comments are usually peppered with words like “organized,” “focused,” “effortless,” “relaxed,” and “efficient.” The general idea seems to be that I always cook in a well-lit kitchen with my photo-ready mise en place and my professional-grade range. I leisurely work my way through recipes while my children play contentedly at my feet, and I somehow manage to keep my vintage-inspired apron free of stains, smudges, or any other signs that I have actually been cooking. Oh, and did I mention I cook in heels? The whole image is very warm, homespun chic, and couldn’t be further from the truth. The reality of most days in the kitchen usually involves me in my cramped, poorly-lit apartment kitchen, still wearing last night’s yoga pants and some ratty t-shirt that I pulled from my husband’s side of the closet, hurriedly cramming as much ingredient prep as I can into nap time. Once the kids are up, the majority of my cooking is either improvised or on autopilot and done with a baby or toddler on my hip while I cook over a stove with only three working burners, two of which are crooked. Martha Stewart, I am not.
A couple of days a week, however, I try to set aside the usual frenetic pace of our afternoon and evening routine and, instead of going to the park or doing arts and crafts with my toddler, we cook dinner together. Most people are surprised that I would enlist the help of a two year old in the kitchen because of the extra cleanup involved, but cooking is much easier when she is happily helping than it is when I’m trying to work around her, so it just makes sense to let her help. She is inquisitive, bright, learns quickly, and is already quite the little sous chef, and nothing beats her smile and her contagious laugh when she is doing something she loves.
How does someone let their child get involved with cooking from such a young age? It takes a little advance planning and patience, but not much else. Here are a few things to keep in mind:
First, don’t tackle a recipe that intimidates you. Cook something you are comfortable with and have made a few times before so that you don’t have any surprises sneak up on you when you already have your hands full with your child.
Second, take a look at the recipe and separate the steps that your child can do either alone or with help from the ones you have to do by yourself. For example, in the meatball recipe below, my daughter didn’t help with any of the steps that involved raw meat and eggs since I know she will do everything in her power to taste whatever she is working with. She mixed the dry ingredients by hand and squeezed the excess liquid from the spinach on her own, and she measured the seasonings with my help. Knowing ahead of time what your child can do will help you with time management and organization.
Third, plan more time than you think you will need. Cooking with your kids isn’t just about cooking. It’s about spending quality time with them, teaching them skills that will benefit them for the rest of their lives, and connecting with them in a way that not many other things allow. You’re elbow to elbow with them for a couple of hours straight, working toward a common goal, with no electronic distractions and plenty of time to talk. Give yourself enough time to really enjoy it.
I have two favorite meatball recipes, and this is the one I usually make before it gets too cold outside. These are not heavy, fatty meatballs, but they’re still substantial enough that you only need a couple on your plate to feel satisfied. As I said in my example above, there is plenty for even a young toddler to do here, and older children can do more, like help incorporate the dry ingredients into the meat and form the meatballs, or even swap out ingredients and change the flavor profile. I like to make double or triple batches and freeze the extras for days that I’m short on time. Keep a small batch of tomato sauce in the freezer, too, and you’ll always have something on hand to throw over rice, pasta, or polenta. The amounts given in the recipe below are for a double batch, which is about 55 meatballs for me, but that will vary depending on how large you make your meatballs. If that sounds like too much, cut the recipe in half for a single batch.
Baked Meatballs
Adapted from Alton Brown
1 lb. each of ground pork, ground lamb, and ground round
2 eggs, lightly beaten (toddler can help beat the eggs)
10 oz. chopped frozen spinach, thawed, and squeezed of excess water (toddler-friendly task)
1 cup freshly grated Pecorino Romano
3 teaspoons each of dried basil and dried parsley
2 teaspoons each of garlic powder and kosher salt
Up to 1 teaspoon of red pepper flakes
1 cup bread crumbs
1. Preheat the oven to 400 degrees. Line two jellyroll pans (cookie sheets) with parchment.
2. In a large bowl, add the ground meats, eggs, and spinach, but to avoid excess mixing (which makes for a tough meatball), wait to mix them together until the dry ingredients are added. Set aside.
3. In another large bowl, add cheese, herbs, seasonings, and bread crumbs and mix thoroughly with your hands. Toddlers love this part.
4. Add the meat mixture to the breadcrumb mixture and lightly mix until well incorporated. Try to avoid mashing the meat, as this will make tough meatballs. You can use the mixture immediately or cover and refrigerate for up to a day.
5. To form the meatballs, roll pieces of the meat mixture into generous golf ball-sized portions and place on parchment-lined cookie sheets. Bake for 2o minutes or until golden brown and cooked through.
Nicole Muvundamina at The Fresh Kitchen teaches in-home cooking classes in the western Chicago suburbs. She works with home cooks of all levels, but she has a soft spot for moms who feel completely clueless in the kitchen. Her goal is to take the intimidation out of cooking and make it fun and approachable for newbies, and to get people who already know their way around the kitchen to step out of their culinary comfort zones and try something new! Follow The Fresh Kitchen on Twitter @TheFreshKitchen and Facebook: TheFreshKitchen.
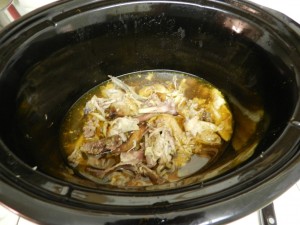
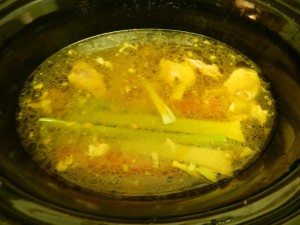 The image looks a little yellow from poor lighting, unfortunately. I let the stock simmer overnight on low. The next morning I drained the veggies and bones out, and poured the stock in a jar. After a day in the fridge, a layer of fat will form on top of the stock. You can spoon it right off. It can be saved to use in other dishes.
